
A Calm and Simple Guide to Saving Overwatered Plants
It’s easy to get carried away with the watering can out of love, but learning how to save overwatered plants often starts by just stepping back. Before you do anything else, stop watering. Give your plant and its soil a chance to breathe and dry out a bit while you figure out what’s going on.
How to Tell if Your Plant Is Overwatered
We’ve all been there. You spot a yellow leaf on your favorite monstera and immediately reach for the water. But sometimes, that well-intentioned drink is the last thing your plant needs. Learning to spot the signs of an overwatered plant is the first, most important step to helping it feel better.
Here's where it can feel a little confusing: an overwatered plant can look a whole lot like a thirsty one. When roots sit in soggy soil, they can’t get the oxygen they need to work properly. They start to struggle and, since they can no longer send water up to the leaves, the whole plant starts to droop—just like it would if it were parched.
The Feel of the Leaves and Soil
So, how do you tell the difference? The real clues are in the details. An underwatered leaf often feels dry and crispy. On an overwatered plant, the leaves will usually feel soft and limp. You might also see the lower leaves turning a distinct yellow before dropping off.
Your best tool is your own finger. Stick it about two inches down into the soil.
- Is it still soggy or wet, even days after you last watered? That’s a good sign your plant has too much water.
- Does the soil feel completely dry and pull away from the edges of the pot? Your plant is probably just thirsty.
- Do you notice a musty or sour smell? This can be a sign that the roots have been sitting in water for too long.
To make it even easier, here’s a quick chart to help you tell the difference at a glance.
Overwatered vs Underwatered Plant Symptoms
Sometimes the signs look very similar. This table breaks down the subtle differences so you can figure out the problem with confidence.
| Symptom | Overwatered Plant | Underwatered Plant |
|---|---|---|
| Leaves | Turn yellow, feel soft and limp, especially lower leaves. | Turn brown at the edges, feel dry and crispy. |
| Wilting | Plant wilts, but the soil is wet. Looks droopy and sad. | Plant wilts, but the soil is bone-dry. Leaves look lifeless. |
| Soil | Feels soggy or wet to the touch long after watering. | Feels dry, hard, and may pull away from the pot's sides. |
| Growth | Stunted growth, new leaves may be small or yellow. | Slow or no new growth. Leaves may be small and brittle. |
| Pot Weight | Pot feels unusually heavy for its size. | Pot feels very lightweight. |
| Smell | Soil may have a musty, sour, or rotten odor. | Soil has no distinct odor, just smells like dry dirt. |
Seeing the signs laid out like this makes it much clearer. The soil is almost always the tie-breaker when you're not sure.
Overwatering a Common Challenge
If you think you've overwatered, please don't worry. It’s one of the most common learning experiences for plant parents. In fact, many plant care experts will tell you that giving too much water is a top reason houseplants struggle. It often leads to a condition called root rot, which can happen if the roots stay soggy for too long.
For most of us with busy lives, the key is noticing the signs early. Watch for those yellowing leaves or wilting even when the soil is wet. Spotting these things right away is your best first step.
A Quick Tip: If a plant is drooping, lift the pot. If it feels heavy and the soil is damp, put the watering can down. A thirsty plant will always feel surprisingly light. Trust that simple weight test to guide your instincts.
Ultimately, learning the difference comes down to observation. Instead of watering on a rigid schedule, just take a moment to check in with your plant. Look at its leaves, feel the soil, lift the pot. These little habits will build your confidence and help you give your plant exactly what it needs, turning that initial worry into a calm, clear plan of action.
Immediate First Aid for Soggy Soil
So you've figured it out: the plant has had too much to drink. Time for some gentle first aid. There’s no need to panic—this part is all about calm, simple actions to stop the problem from getting worse. We just need to help your plant stabilize and give it a chance to dry out.
Think of it as helping your plant breathe again. When soil is completely soaked, there's no room for the oxygen that roots need. Our immediate goal is to get rid of that excess water and reintroduce some air without causing more stress.
Gently Free the Root Ball
First thing's first: let’s see what’s happening below the surface. This means you’ll need to carefully slide your plant out of its pot.
Lay the pot on its side and tap the bottom and sides a few times to loosen it up. If it’s really stuck, you can run a butter knife around the inside edge. Hold the plant by the base of its stems and gently ease the entire root ball out. Try to keep it all in one piece.
Once it's out, set the whole root ball on a layer of newspaper, an old towel, or a stack of paper towels. These will act like a sponge, helping to pull moisture from the soggy soil.
Let the Roots Air Out
Now that the roots are free from their wet home, they can finally get some air. Find a spot for your plant that has good air circulation but is out of harsh, direct sunlight.
A Quick Word on Sunlight: You might be tempted to put a soggy plant in a sunny window to speed up the drying process. Please don't. An already-stressed plant is very sensitive to sunburn, and the intense light will only ask for more water from a root system that just can't provide it right now.
To help things along, you can aim a small fan at the root ball, but keep it on a low setting. The goal isn't to blast it with air, just to create a gentle breeze that encourages evaporation. Let the plant air out like this for several hours or even up to a full day, depending on how wet the soil is.
This simple flowchart is a great reminder of the key difference: yellow, soft leaves usually point to too much water, while crispy, brown leaves suggest thirst.
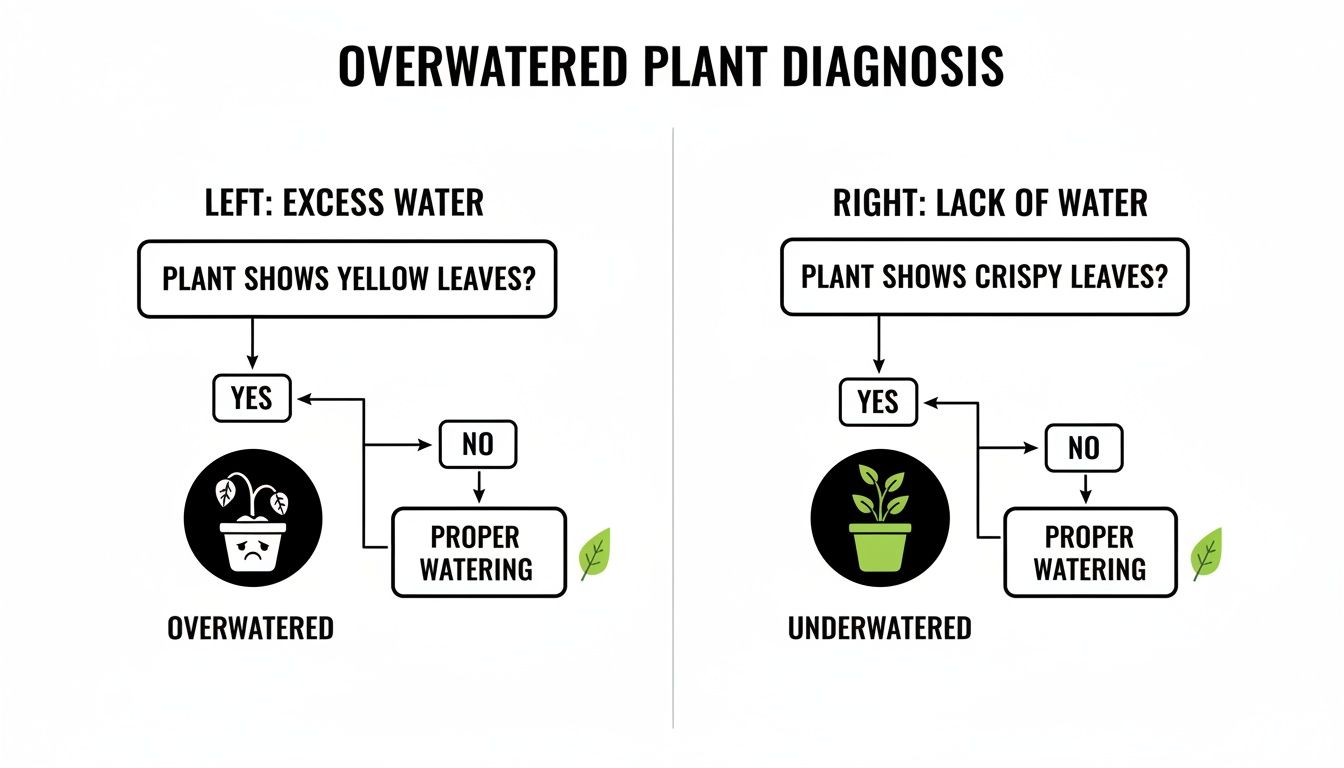
It's a perfect visual guide: when leaves turn yellow, your first instinct should always be to check the soil moisture, not reach for the watering can again.
Inspect the Roots for Damage
While the root ball is airing out, it's the perfect time to take a closer look at the roots themselves. This is probably the most important step, as it tells you exactly what needs to be done next.
You’re looking for the difference between healthy and unhealthy roots. It’s usually pretty obvious.
- Healthy roots are firm, pliable, and light-colored—often white, tan, or even a light orange.
- Unhealthy roots are the opposite. They will look dark brown or black, feel mushy or slimy, and might even fall apart if you touch them. You may also notice an unpleasant smell.
If you find mushy, dark roots, take a breath. It’s a clear sign of root rot, but it’s often fixable. The key is catching it early. If most of the roots still look firm and light-colored, your plant is probably just waterlogged and will bounce back just fine after this drying-out period.
Treating Root Rot with a Fresh Start
Okay, you’ve taken the plant out and had a look at the roots. If you see dark, mushy, or even smelly bits, take a deep breath. The phrase root rot sounds scary, but it’s often fixable. Think of this next step less like a rescue mission and more like a spa day for your plant—a chance to trim away what's no longer healthy and give it a clean, fresh start.
The goal here is simple: get rid of the damaged parts so the plant can focus its energy on growing new, healthy roots. You’ve already done the hard part by spotting the issue. Now you just need some clean scissors and a little patience.
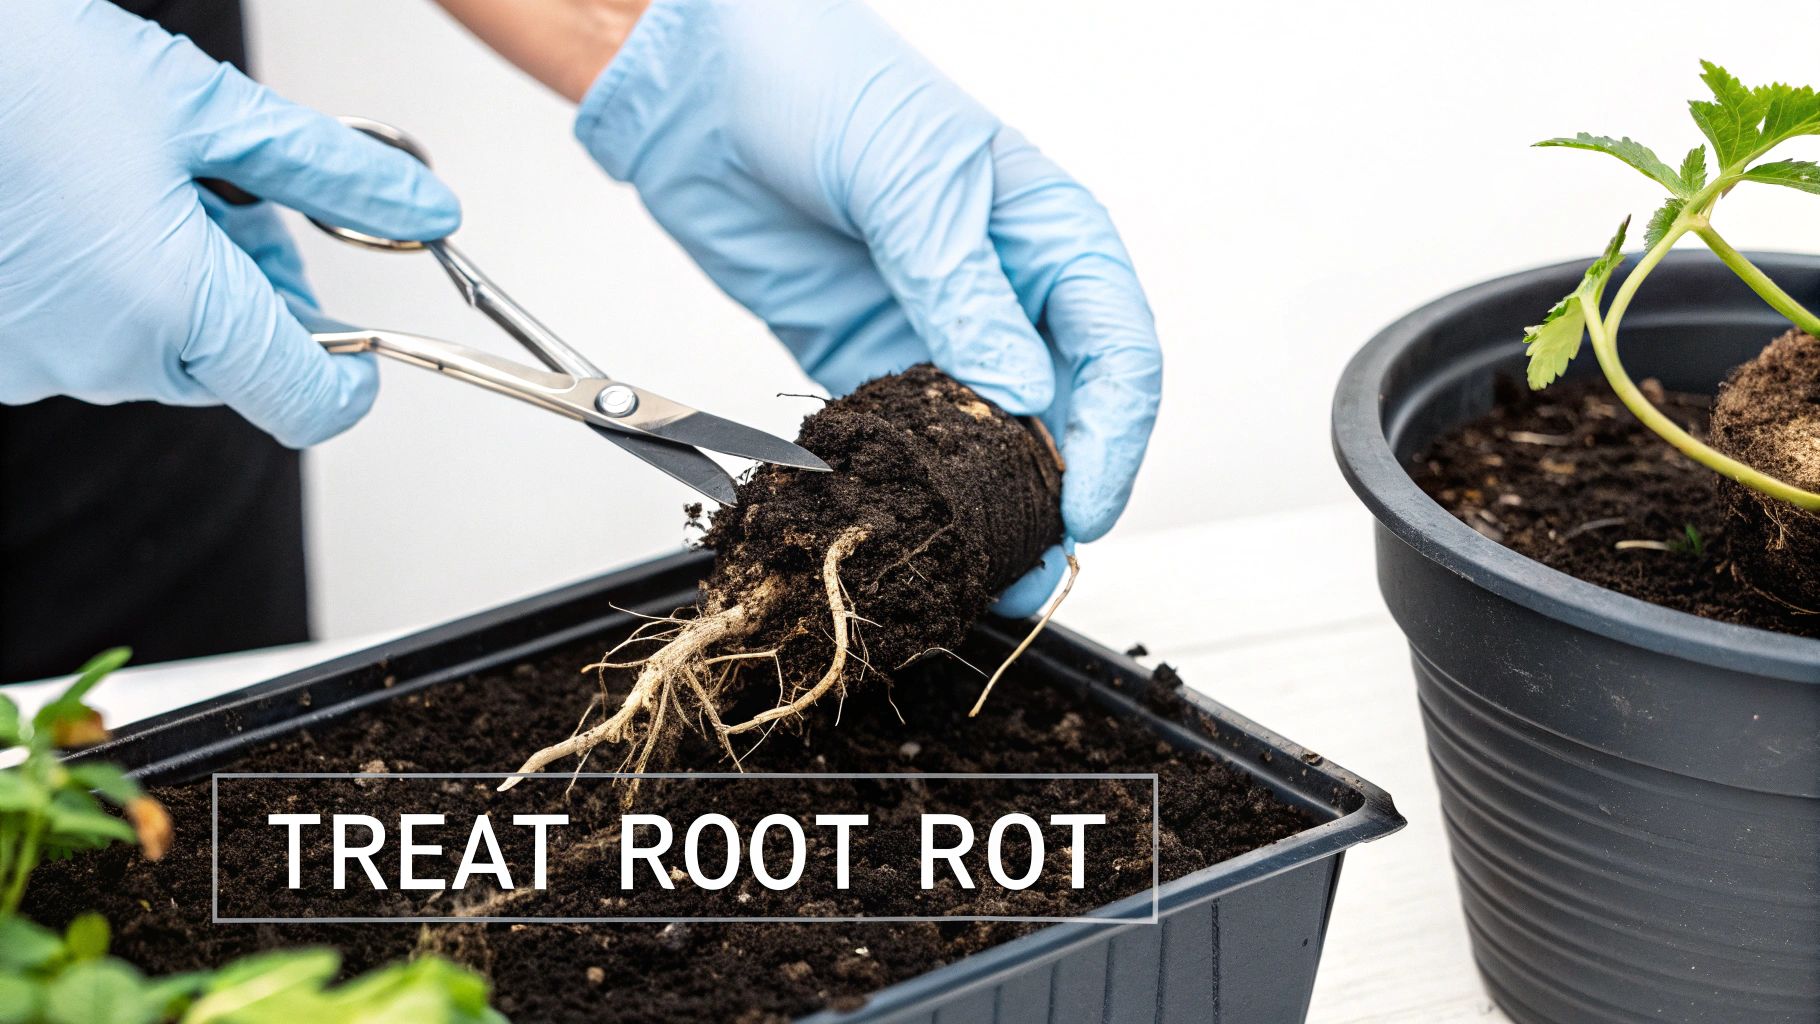
Performing Gentle Root Pruning
Before you start trimming, you need a clear view of what you’re working with. Take the root ball over to a sink and gently rinse away as much of that old, soggy soil as you can. This will let you see the difference between the good roots and the bad ones.
Once they're rinsed, lay the plant on a towel and take a look. You'll see two types of roots:
- Healthy Roots: These are the ones we want to keep. They'll be firm to the touch and usually white, tan, or off-white.
- Unhealthy Roots: This is the problem. They'll look dark brown or black, feel slimy or mushy, and might even fall apart as you handle them.
Grab a pair of scissors or pruning shears you’ve wiped down with rubbing alcohol, and carefully trim away all the unhealthy roots. Be thorough but gentle. If a root is dark and mushy, it needs to go—it can’t be saved and will only spread decay to the healthy tissue if you leave it.
Why Sterilize Your Tools? Root rot can be caused by fungi and bacteria living in the soil. Wiping your scissors with alcohol before and after trimming helps prevent spreading those microbes to healthy roots or even to other plants. It's a quick step that makes a big difference.
After you've trimmed everything away, you might be left with a much smaller root system. That’s perfectly okay and completely normal. Your plant now has a clean, solid foundation to rebuild from.
Choosing the Right New Home
After pruning comes recovery, and that means a fresh start in a clean environment. Don't reuse the old soil; that’s just inviting the problem right back. Always start with a fresh, well-draining potting mix. The pot you choose is just as important.
You have two solid options, both focused on preventing this from happening again:
- A Pot with Excellent Drainage: The easiest choice is a simple plastic nursery pot or a terracotta pot—something with plenty of drainage holes. These materials are breathable and let excess water escape easily.
- A Clean, Disinfected Pot: If you love the original pot and want to reuse it, you must disinfect it first. Wash it with hot, soapy water, then let it soak for about 15 minutes in a solution of one part bleach to nine parts water. Rinse it well and let it air dry completely.
When it comes to size, resist the urge to give your plant "room to grow." A pot that's too big holds on to too much soil, which stays wet for too long and creates the same soggy conditions that caused the problem in the first place. Pick a new pot that’s just big enough to comfortably fit the trimmed root system.
Repotting for a Healthy Future
With your clean pot and fresh soil ready, it's time to repot. Add a layer of new potting mix to the bottom, center the plant inside, and gently fill in around the sides. Lightly pat the soil down to get rid of any major air pockets.
Acting quickly is one of the biggest factors in helping a plant with root rot. Studies show that plants recover from water stress much better when given prompt care. For houseplants, this means addressing soggy soil within a few days to give them the best chance. By trimming away unhealthy roots and providing fresh soil, you give your plant a strong opportunity to heal.
Once it's repotted, give the plant a very light watering—just enough to help the soil settle around the roots. Don't drench it. Your plant is officially on the road to recovery. Now, it’s all about gentle, patient care.
Guiding Your Plant Through Recovery
So, you’ve made it through the first-aid phase. Whether you just had to let the soil air out or you performed some careful root pruning, your plant is now officially in recovery. This is the quiet part of the journey, where patience and gentle observation become your most important tools.
Think of it like nursing a friend back to health—it’s all about rest, the right environment, and giving them time to heal at their own pace. The biggest mistake you can make right now is trying to do too much. Your plant’s root system is delicate, which means its ability to take up water and nutrients is limited. It’s a time for simplicity.
Hold Off on Fertilizer for Now
I know it feels tempting to give your recovering plant a "boost" with fertilizer, but please, step away from the plant food. This is one of those times where your good intentions can actually do more harm than good. A recovering root system is very sensitive, and the concentrated salts in fertilizers can easily burn the fragile new roots that are trying to grow.
Feeding a stressed plant is like asking someone who's feeling unwell to eat a huge meal—it’s just too much for their system to handle. Instead, just let the plant pull what it needs from the fresh potting mix you've given it. There will be plenty of time for feeding once it’s clearly feeling better.
Finding the Right Light and Air
With its root system working hard just to heal, your plant needs an energy source that's just right. Settle it into a spot where it will get plenty of bright, indirect light. A spot near an east-facing window or a few feet back from a south- or west-facing window is usually perfect.
The one thing to avoid at all costs is harsh, direct sunlight. A weakened plant can get scorched easily, adding another layer of stress it doesn't need. Good air circulation is a plus, too, as it helps the soil dry out evenly. Just make sure to keep your plant away from strong drafts from vents or open windows.
A New Approach to Watering
Your watering habits need a complete reset. After repotting, you gave the soil a light drink to help it settle in. Now, you wait. You're going to let the soil dry out more than you normally would before even thinking about watering again.
The classic finger test is your best friend here. Don't water until the top two inches of soil feel completely dry to the touch.
When you do finally water, do it thoroughly. Let the water run all the way through until a little trickles out of the drainage holes, and then let it drain completely. Never let the pot sit in a saucer full of water. This one habit is probably the single most effective way to prevent this whole situation from happening again.
The goal here is to create a consistent cycle: a good, long dry-out period followed by a thorough drink. This encourages the roots to grow strong as they search for moisture, while also making sure they get plenty of oxygen between waterings.
Patience and Watching for Positive Signs
Recovery is a slow dance. Some plants might bounce back in a few weeks, while others—especially those that had their roots trimmed—could take a month or more. It's so easy to get discouraged when you don't see immediate results, but remember, your plant is doing important work below the surface, rebuilding its foundation.
The first signs of recovery are often subtle, but they feel like a huge win. Keep an eye out for:
- Tiny new leaves unfurling. This is the best sign that your plant has stabilized and has enough energy to push out new growth.
- Existing leaves perking up. It no longer looks limp and sad.
- A firm, strong stem. This tells you the roots are successfully delivering water again.
This part of the process is really just a quiet, hopeful waiting game. Your calm, consistent care is creating the perfect environment for your plant to heal itself. And once you're in the clear, you can explore our guide on how self-watering containers work to see how simple tools can help maintain that perfect moisture balance for good.
Building Smarter Watering Habits
Once your plant is safely on the road to recovery, the goal shifts from rescue to routine. Honestly, the best way to save an overwatered plant is to build habits that prevent it from happening in the first place. This isn't about rigid schedules; it's about learning your plant's language and finding a rhythm that works for both of you.
First, let go of the idea that you should water on a fixed day, like every Sunday. A plant's thirst changes all the time based on the season, how much light it's getting, and the temperature in your home. A consistent approach means checking in regularly, not just watering on a timeline.
Master the Finger Test
The simplest, most reliable tool you have is your own finger. Seriously. Before you reach for the watering can, just stick your index finger about two inches into the soil.
- If the soil feels moist or sticks to your finger, hold off on watering. Your plant isn't ready. Give it a few more days and check again.
- If the soil feels dry and crumbles off your finger, it’s time to water.
This one simple check cuts through all the guesswork. It’s a direct way to understand what your plant is actually experiencing at the root level, making it easy to know when to water plants with total confidence.
A Note on Seasons: Your plant’s needs will shift throughout the year. During the long, sunny days of spring and summer, it's growing actively and will be much thirstier. But in the shorter, darker days of fall and winter, its growth slows down, and it will need far less water. A plant you watered weekly in July might only need a drink every three or four weeks in January.
Automating Consistency for Busy Lives
Let's be real—life gets hectic. Between work, travel, and everything else, a perfect plant care routine can feel like another chore. This is where a few simple tools can make a world of difference. They don't replace your care; they just make it more consistent and forgiving.
For frequent travelers, apartment dwellers, or anyone with a packed schedule, self-watering tools are a great way to prevent both over- and underwatering.
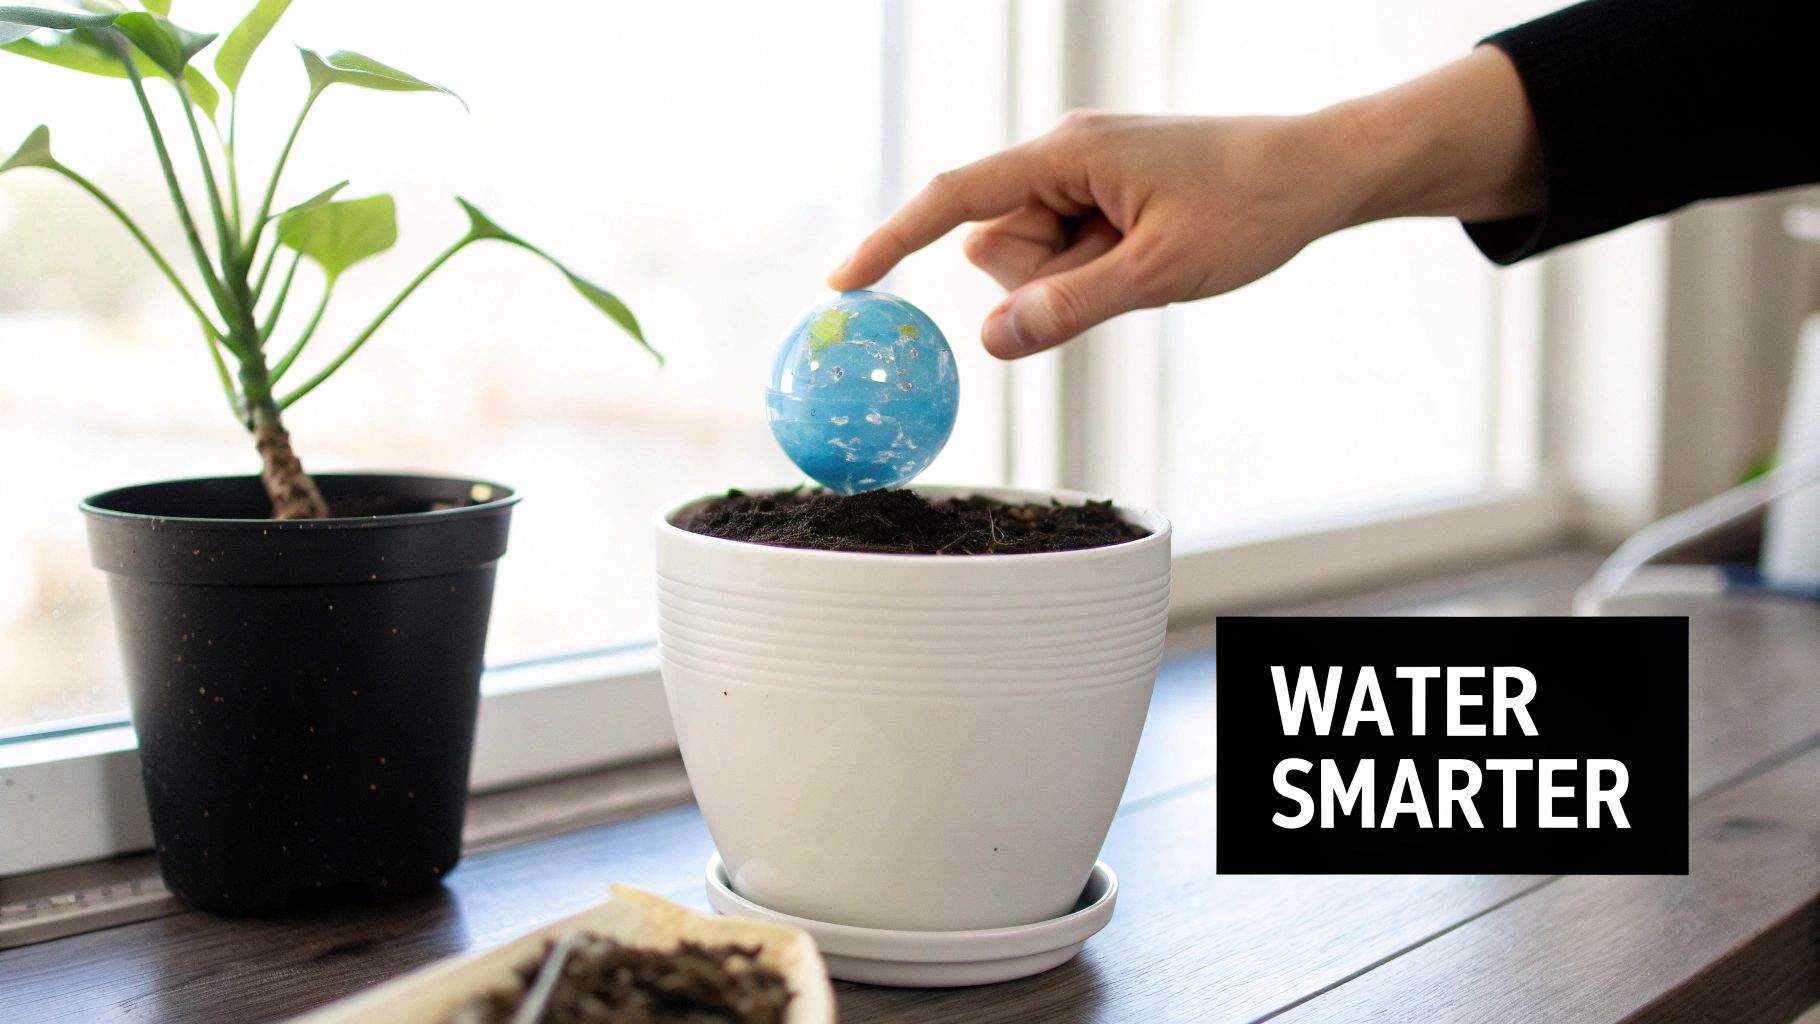
Consider something as simple and effective as self-watering globes. These aren't complicated gadgets. They work on a simple principle: you fill the globe with water and push its stake into the soil. As the soil dries out, it naturally pulls water from the globe. Once it's moist enough, the flow stops. All by itself.
This creates a wonderfully balanced system.
- No More Guesswork: The plant takes exactly what it needs, right when it needs it.
- Vacation-Proof Your Plants: You can leave for a weekend or even a week knowing your plants have a steady supply of moisture without being drowned.
- Effortless Consistency: It helps maintain that ideal, slightly moist soil that is the cornerstone of preventing root rot.
Little Green Leaf self-watering globes were designed with this in mind, offering a simple way to help keep your plants perfectly hydrated. They are a great example of a tool that supports good habits, turning plant care into something that feels effortless, not stressful.
Little Details That Make a Big Difference
Beyond just watering, a few other small habits can set your plants up for long-term success. These details work together to create a healthy environment where roots can breathe and grow strong.
- Always Use Pots with Drainage: This one is a must. Every pot should have at least one drainage hole for excess water to escape. If you fall in love with a decorative pot that doesn't have one, just use it as a "cachepot." Keep your plant in its simple nursery pot and place it inside the decorative one.
- Pick the Right Pot Size: When you repot, choose a new container that's only one or two inches larger in diameter. A pot that's way too big holds a lot of extra soil that stays wet for too long, which can lead to root rot.
- Water Thoroughly, Not Frequently: When it’s actually time to water, give your plant a deep drink until you see water run out of the drainage holes. This encourages the roots to grow down deep and strong. Just be sure to empty any water that collects in the saucer so the plant isn't left sitting in a puddle.
Building these smarter habits is the final, most important step in your journey. It's about creating a simple, sustainable routine that nurtures both your plants and your confidence as a plant parent.
Got Questions? We've Got Answers.
Even after you’ve helped your plant recover, it’s totally normal to have some lingering questions. A big part of being a plant parent is learning as you go, so let’s tackle some of the most common worries that come up.
How Long Will It Take for My Plant to Recover?
Honestly, it really depends on the plant and how much stress it went through. A mildly overwatered plant might perk up in just a week or two once its soil has had a chance to dry out completely.
If you had to prune the roots to get rid of rot, you’ll need to be more patient. It could take a month or more for it to grow a new, healthy root system and start pushing out new leaves. The key here is patience. Don't try to rush things with fertilizer or more water—just give it a stable spot with good, indirect light and let it heal.
Should I Put My Plant in Direct Sun to Dry It Out Faster?
It’s tempting, but this is a definite no. While it seems logical that more sun would speed up drying, a plant that’s already stressed is very vulnerable. Putting it in direct sun is likely to cause sunburn and more shock.
Strong, direct sunlight can easily scorch the leaves and asks for more water from a root system that is already struggling and can't keep up. Instead, choose a location with bright, indirect light where it can recover gently.
Can I Reuse the Pot After Root Rot?
Absolutely, but you must clean and disinfect it first. This is a very important step. The fungi and bacteria that cause root rot can hang out in old soil and hide in the pot, waiting to infect your plant all over again.
To give your plant a truly fresh start, follow these simple steps:
- Scrub it Down: Use hot, soapy water to wash the pot thoroughly, getting rid of any old soil.
- Disinfect: Let the pot soak for at least 15-20 minutes in a solution of one part household bleach to nine parts water.
- Rinse and Dry: Rinse it completely to get rid of any lingering bleach, then let it air dry before you add new soil.
Taking a few extra minutes for this step ensures your plant’s new home is healthy and clean. And if you're trying to get a better handle on your plant's watering needs, especially when you're away, our guide on how long plants can go without water is a great resource.
At Little Green Leaf, we believe plant care should be rewarding, not a source of stress. Our beautiful, decorative self-watering globes are designed to help you nail that perfect moisture balance, giving your plants a consistent drink right when they need it. Check them out and discover an easier way to a thriving indoor garden at https://www.littlegreenleaf.co.