

Rose Cones for Winter Protection: A Calm Step-by-Step Guide
A first hard freeze is coming, and your rose is still standing in the garden with its canes exposed. You may be wondering whether a foam rose cone is the missing piece, or whether covering the plant too soon could create a different set of problems.
Rose cones for winter protection can help in some cold, windy gardens, but they work best as part of a complete setup. Soil mounding, ventilation, anchoring, and seasonal timing matter just as much as the cone itself. The aim isn't to seal the rose away from winter. It's to help the plant remain dormant, insulated, and protected from damaging swings in temperature.
Why Roses Need Winter Protection and Where Cones Fit In
A rose may look healthy as winter arrives, then show damaged canes or a weakened base in spring. Dry winds remove moisture from exposed stems, while freeze-thaw cycles repeatedly expand and contract tissues around the crown or graft union. A steady, cold dormancy is safer than daytime warming followed by nighttime freezing.
Rose cones became widely used in North American gardens during the late twentieth century because they were convenient, easy to place, and readily available. Their role is more limited than the product shape suggests. An enclosed cone can hold moisture and become hot in winter sunlight. Purdue University's guidance on hibernating roses recommends cutting slits near the top to improve ventilation. North Dakota State University's advice on winter protection for tender roses also cautions that cones may warm enough to interrupt dormancy, increasing the chance of winter injury or plant death.
The helpful way to think about a cone: it's a windbreak and cover, not a complete winter shelter.
The cone is one part of a protection system. A mound of soil at the base provides the main buffer, shielding the crown or graft union from abrupt temperature changes. The cone helps keep that mound in place and reduces drying wind around the canes, while openings allow excess heat and moisture to escape.
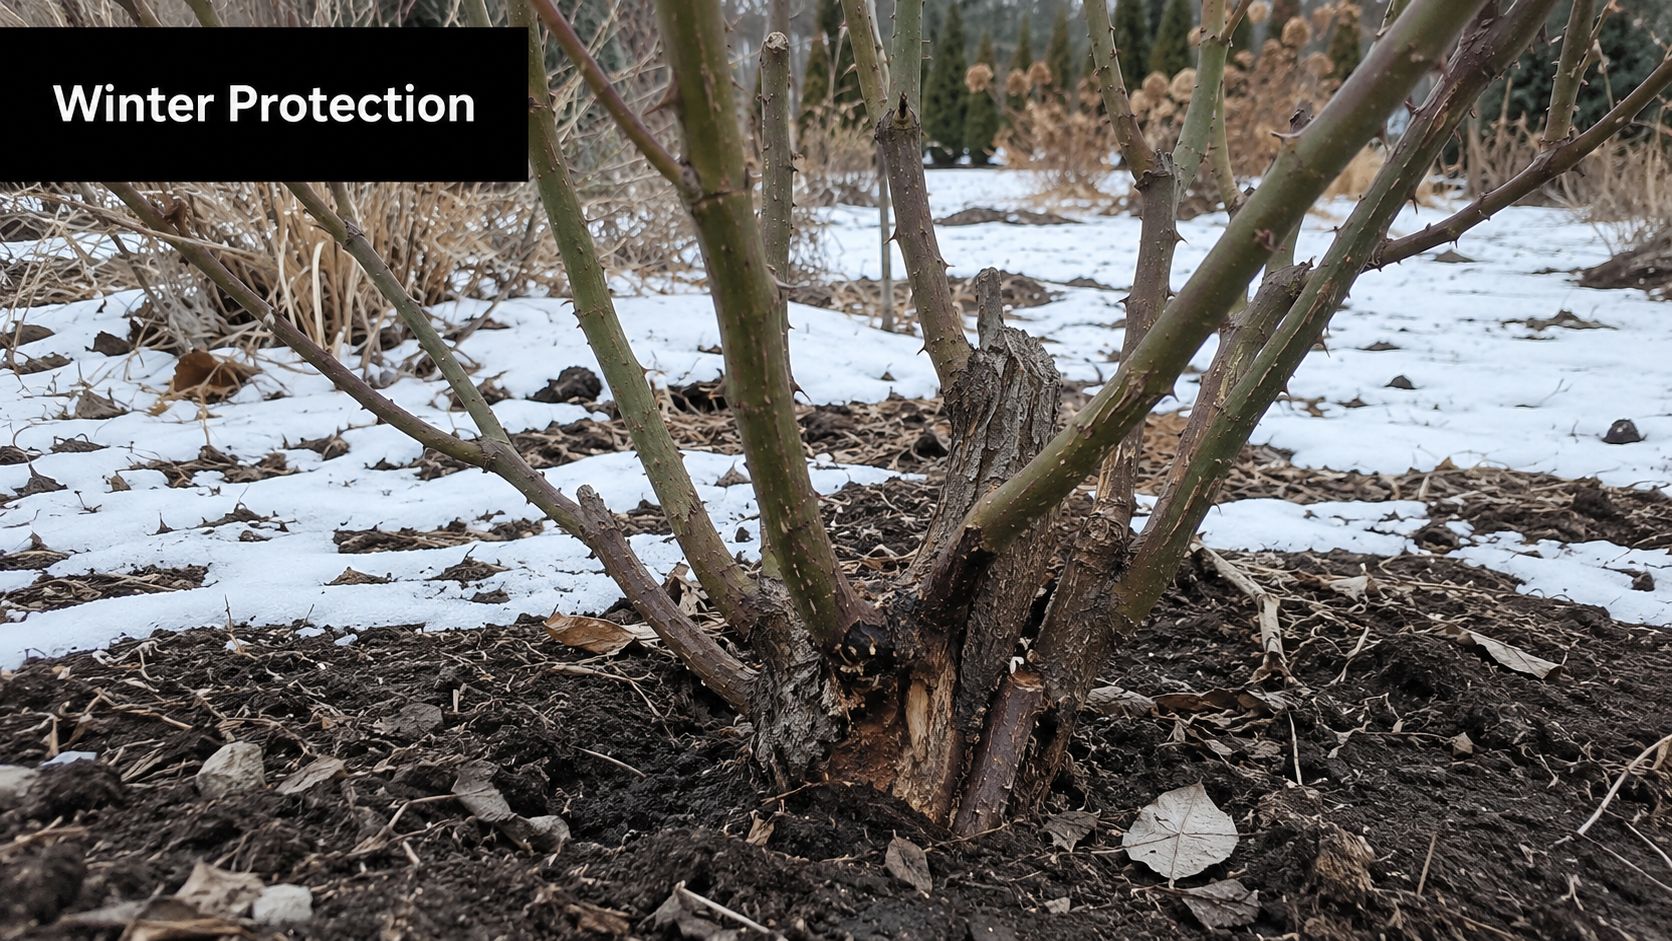
Some gardeners use no cone because their roses tolerate local winters without added coverage. Others need one because the planting site is exposed, windy, or receives unreliable snow cover. Both choices can work. The right setup depends on the rose variety, its location, the winter pattern, and whether you can inspect the cover during the season. A cone is useful when those conditions call for it, provided soil mounding, ventilation, secure placement, and proper timing are treated as part of the same system.
Getting Your Roses Ready Before the Cones Go On
Preparation starts with the plant, not the cone. A rose that's still actively growing, carrying wet leaves, or standing in dry soil isn't ready to be enclosed.
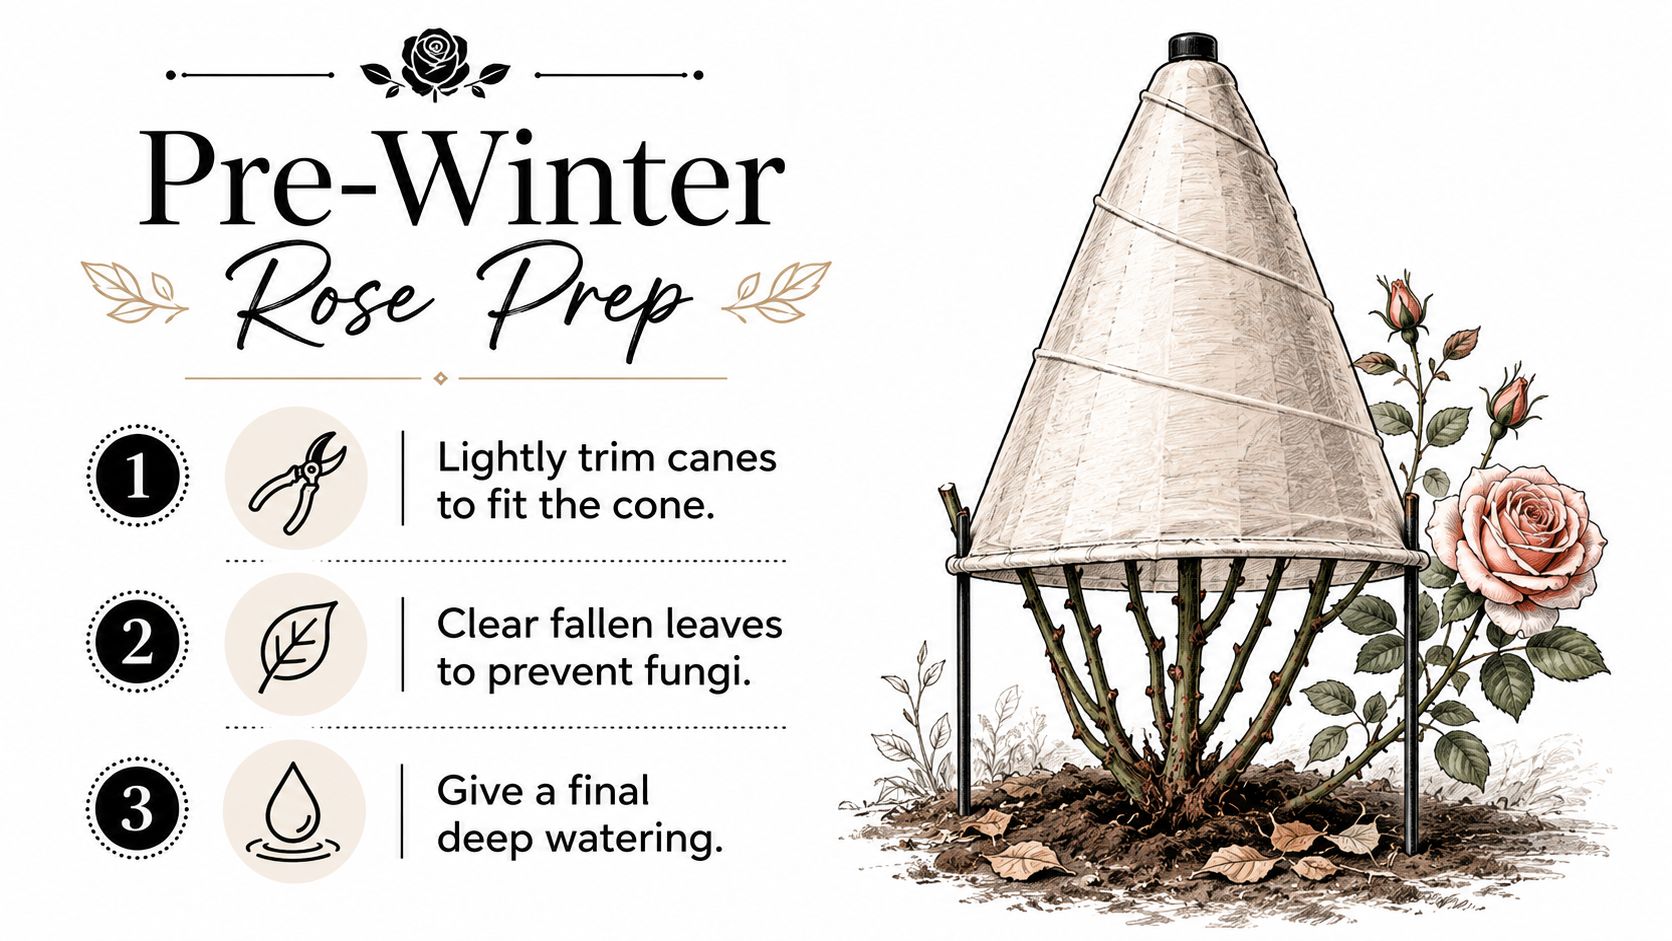
Begin by checking the canes. Remove anything broken, damaged, or clearly diseased, and make only a light trim if the plant needs to fit inside the cone. Avoid heavy shaping in fall. Chicago Botanic Garden's autumn rose guidance advises keeping fall pruning restrained, except where winter protection requires cutting a plant back.
Clear fallen leaves and other debris from around the rose. This removes damp material that can encourage fungal problems under a cover. Keep the cleanup gentle, and don't scrape aggressively around the crown or disturb the soil where the plant is rooted.
Check the base before covering
Identify whether your rose is own-root or grafted if you can. A grafted rose has a visible union where the chosen flowering variety joins the rootstock, and that union deserves particular attention because it can be more vulnerable than the roots below it. If you're unsure, look for a swollen, knobby area near the base or check the plant label and nursery information.
Water the soil at the root zone before the ground freezes, especially if autumn has been dry. Watering the foliage isn't helpful here. The aim is to prevent the plant from entering winter with dry soil around its roots, while still avoiding soggy conditions.
If you're estimating how much loose material you'll need for a larger planting, a guide such as this explanation of mulch measurements can help with planning. Use clean soil or another suitable insulating material, and keep the material loose rather than packing it tightly against the stems.
Wait until the rose has gone dormant. Covering too early can trap moisture and encourage soft, active growth beneath the cone. A ready plant has finished its autumn growth, has experienced hard frost, and is entering a period of sustained cold.
Installing and Securing Your Rose Cones the Right Way
The installation is simple once the base is prepared. First, mound soil around the base of the plant, covering the crown or graft union. Nebraska Extension recommends a 6 to 8 inch soil mound because the cone alone isn't sufficient, while Iowa State Extension's rose winterization guidance gives a ventilation standard of four to five 1-inch holes around the top and bottom of the cone. In some climates, extension guidance recommends a deeper mound of 10 to 12 inches, or 20 to 25 cm, as described by Nebraska Extension's rose winter-protection advice.
Choose the depth that fits your regional conditions and the guidance used in your area. The mound should protect the base without burying the whole plant in wet, compacted material.
Build the protective base first
Shape the soil so it covers the crown or graft union evenly. Then make sure the cone can sit over the rose without crushing the canes. A light trim can help, but don't force brittle stems into place.
Set the cone over the mounded rose and press its lower edge into the soil if the design allows. The cone should sit securely, with enough room around the plant for air circulation. Don't use it as an airtight container.
Weight the cone with a brick or stone. Wind can lift or shift a lightweight cover, exposing the plant or rubbing the canes against the cone. Southern Living's winter rose guidance also recommends securing cones with bricks or stones.
Ventilation is the detail many beginners miss. Purdue recommends cutting slits in the top, and Iowa State recommends four to five 1-inch holes around the top and bottom. These openings help reduce heat and moisture buildup when winter sun reaches the cone.
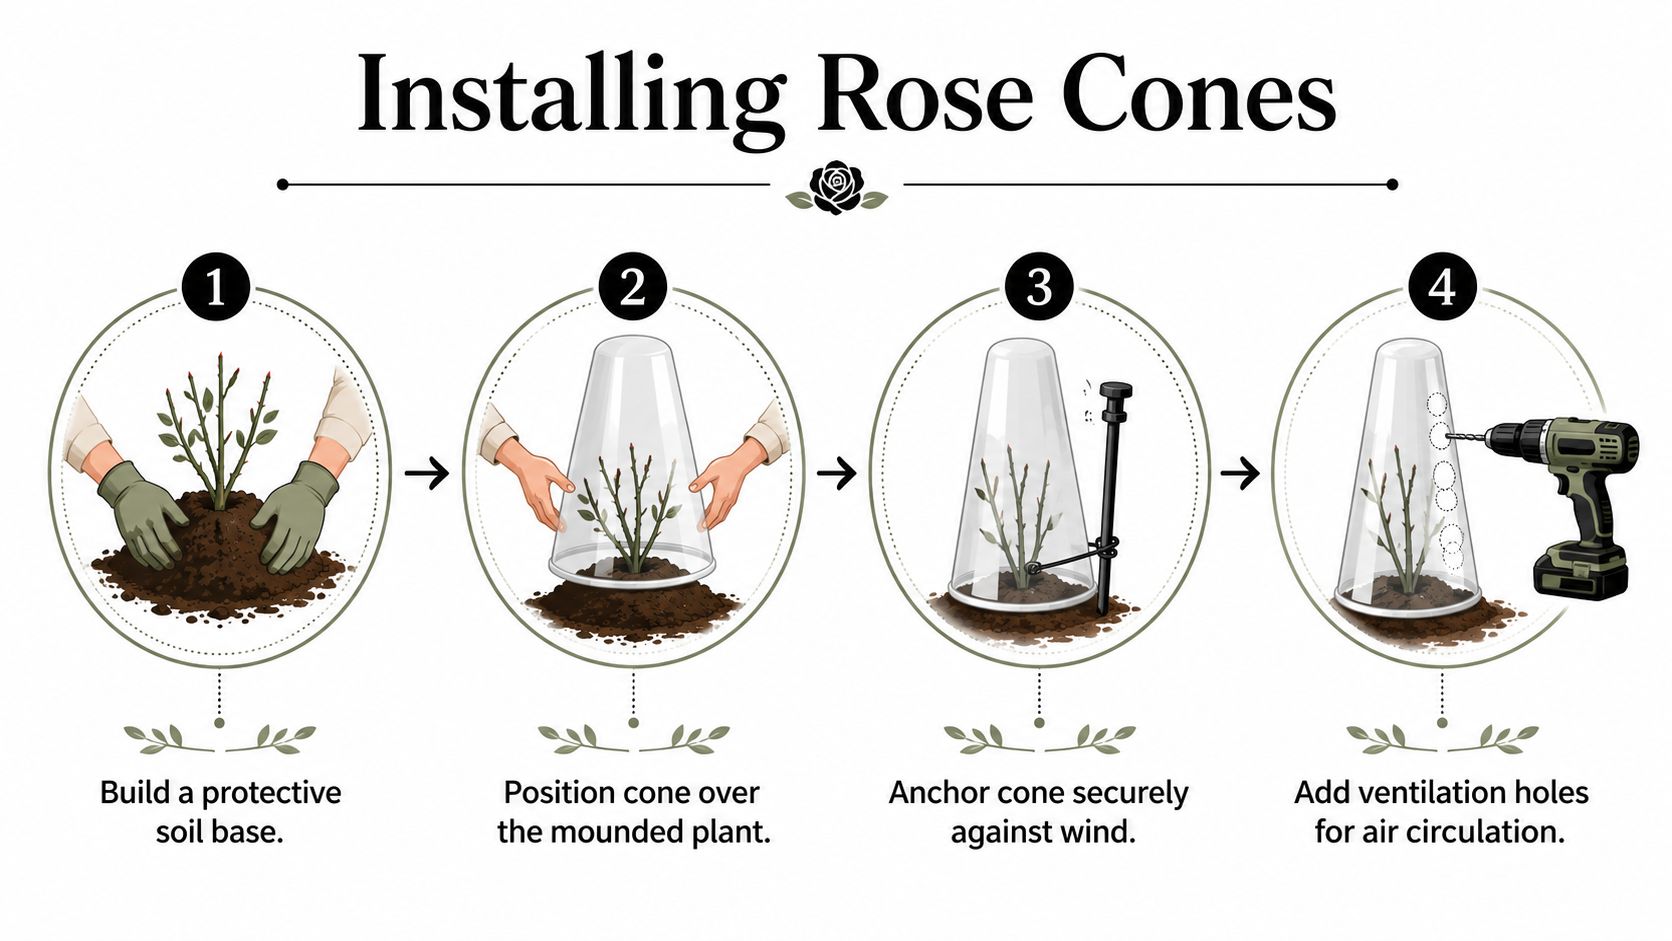
Quick check: the cone should be weighted, vented, and supported by a soil mound. If one of those pieces is missing, the setup isn't finished.
Look over the cover after installation. Check that the lower edge is stable, the mound still reaches the base, and the ventilation openings aren't blocked by soil, leaves, or snow. A short inspection now can prevent a much larger repair later.
Rose Cones vs. Other Winter Protection Methods
A cone is practical when you want a defined cover that can be anchored against wind. It isn't automatically the best choice for every rose or every winter. Regional guidance increasingly favors a system-first approach, combining base insulation with breathable protection rather than relying on a single product.
| Method | Best Climate | Effort Level | Key Risk |
|---|---|---|---|
| Rose cone with soil mound | Cold, windy sites where regular checks are possible | Moderate | Heat and moisture buildup if the cone isn't vented |
| Soil mound alone | Areas where the base needs protection but the canes are relatively sheltered | Low | Exposed canes may still suffer from wind or cold |
| Leaf or straw cage | Gardens needing breathable insulation around the plant | Moderate | Loose material can become wet or shift |
| Burlap wrap | Exposed plants needing wind protection | Moderate | Tight or damp wrapping can restrict airflow |
| Trenching or tipping | Tender roses that can be moved close to the ground | High | More physical work and greater risk of stem breakage |
A soil mound is the common foundation across these options. Leaf or straw cages can add breathable insulation without creating the enclosed air pocket that makes some cones problematic. Burlap can reduce drying wind, but it must be secured without pressing tightly against wet stems.
For broader garden maintenance, mulch application for landscapers offers useful context on applying and managing mulch around plants. Gardeners also sometimes use netting or cages to hold loose coverings in place, and this guide to netting for vegetables can help you understand the basic idea of supporting protective material without compressing it.
Match the method to your winter
Snow cover changes the calculation. Quebec horticulture guidance describes cone efficiency as dependent on snow cover, with about 40 cm of snow considered ideal in that context, as summarized in Iowa State Extension's regional plant guidance. If snow is unreliable, the soil mound and anchoring become even more important.
For a sheltered garden with hardy roses, a mound and loose insulation may be enough. For a windy site, a cone or burlap can add useful protection. For tender roses, trenching or tipping may be more suitable than trying to make a cone do everything.
Seasonal Timing and When to Remove Protection
Timing protects the plant from both winter cold and premature spring growth. Put the cone on after the rose has experienced several days of below-freezing temperatures and has entered dormancy. Waiting matters because an early cover can hold humidity and warmth around a plant that hasn't finished preparing for winter.
Chicago Botanic Garden recommends waiting until after several days of below-freezing temperatures, then building an 8 to 10 inch mound over the base of the plant. That depth differs from other regional recommendations, which is why local conditions should guide your final setup rather than a fixed calendar date.
Follow weather signs instead of the calendar
Use the first hard frost as a signal to begin watching the plant, not necessarily as the moment to cover it. Look for sustained cold, dormant growth, and a forecast that doesn't immediately return to mild weather. A late, warm autumn may delay the work, while an exposed garden may need attention sooner once the rose is dormant.
During winter, inspect the cone after strong wind, rain, or heavy snow. Make sure it remains anchored and that ventilation openings stay clear. Avoid repeatedly opening the cover on every mild afternoon, but do respond to prolonged sunny warmth or obvious condensation.
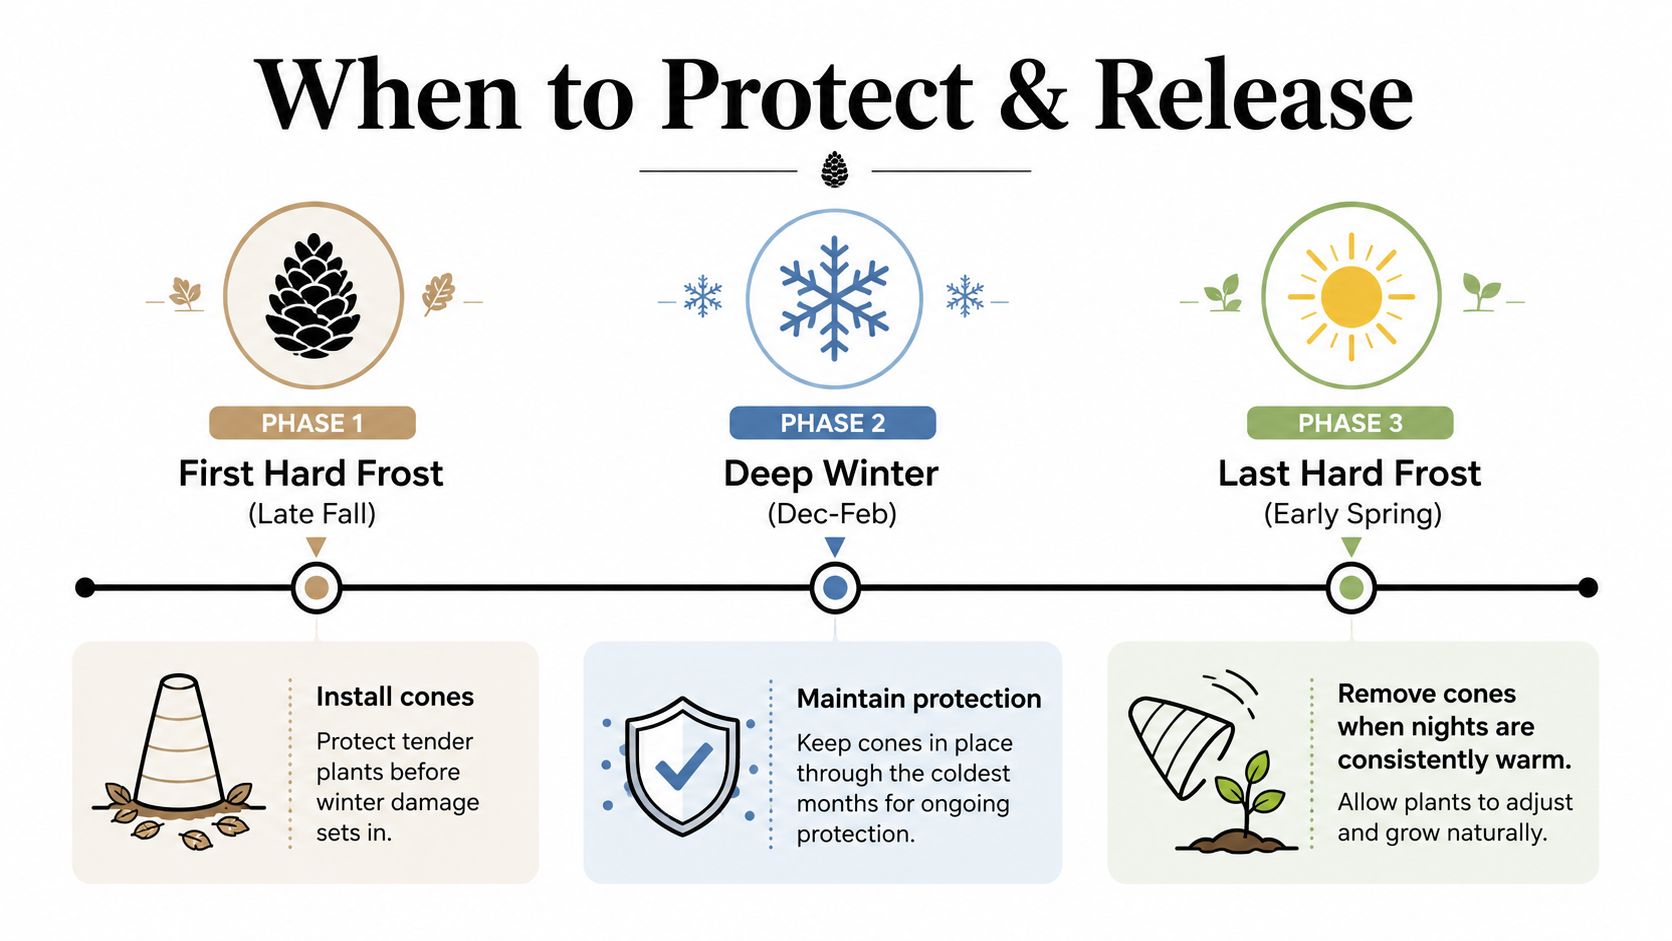
Spring removal should be gradual. Chicago Botanic Garden recommends removing winter protection in late March or early April when new growth begins, while the seasonal conditions in your own garden may shift that window. Start by loosening or partially opening the protection, then watch the forecast and the plant before removing everything.
Spring rule: remove protection as new growth begins rather than leaving a warming rose sealed inside.
A rose that starts growing beneath a cone can produce soft shoots that are easily damaged by a returning freeze. If you're used to protecting warm-season plants, this guide to whether pepper plants are perennial is a useful reminder that winter care depends heavily on the plant and the local climate, not just the season name.
Troubleshooting Common Rose Cone Problems
A cone can look properly installed and still create trouble. Condensation, early growth, wind movement, and animal shelter each point to a different adjustment. Treat the cone as part of a system with the soil mound and ventilation, not as a sealed product that solves every winter risk.
Condensation and mold
Water inside the cone usually means humid air is not escaping. Wet leaves and fallen debris hold that moisture against the plant, increasing the chance of fungal growth.
Check that the upper and lower ventilation holes remain open. If the interior stays wet or the rose has begun growing, choose a dry period to remove the cone, clear debris, and let the plant and soil surface dry. Reinstall the cover only when it can provide open airflow.
Premature growth
On a sunny winter day, the cone may warm faster than the surrounding garden. Swollen buds or tender shoots while freezing weather remains possible show that the rose may be leaving dormancy too soon.
Increase ventilation and reconsider whether the cover suits the current conditions. A rose needs protection from sharp cold while staying dormant. Heat trapped beneath the cone works against that balance, as noted earlier in North Dakota State University's winter-protection guidance.
Wind displacement
A shifted cone can expose the soil mound or scrape against the canes. Lift it carefully, rebuild the mound around the base if soil has moved, and secure the cone with a brick or stone. Inspect the lower edge after strong wind instead of waiting for the next routine check.
Rodents and damaged canes
The sheltered space may attract animals. Clear loose leaves and debris from the base, then look for gnawing, disturbed soil, or canes rubbing against the cover. A damp, crowded interior can cause more trouble than the original cold, so remove the cone during a suitable dry period if you cannot restore clean airflow and safe spacing.
Remove the cone completely when: the rose is breaking dormancy, moisture remains trapped, or the cover keeps shifting despite added anchoring.
These warning signs are useful feedback, not a gardening failure. They show that the weather or the plant has changed, and the protection must change with it. A rose cone works best when you keep checking the conditions it creates, rather than assuming the setup will remain right all winter.
Your Calm Plan for Protecting Roses This Winter
Prepare in late fall by lightly trimming only what must fit, clearing leaves, and watering the root zone. After several days of below-freezing weather, mound soil around the base, using regional guidance that may call for 6 to 8 inches, 8 to 10 inches, or, in some climates, 10 to 12 inches. Place the cone, anchor it with a brick or stone, and provide ventilation, including four to five 1-inch holes around the top and bottom where that standard suits your cone.
Check the setup after severe weather, then remove protection gradually as new growth begins in spring. Your rose doesn't need a perfect winter routine. It needs a consistent one that keeps the base insulated, the air moving, and the plant dormant for as long as the weather requires.
If you want simpler plant care beyond the winter garden, Little Green Leaf offers decorative self-watering globes that release moisture gradually at the root zone. Visit the shop to find a practical, thoughtful option for everyday plants, travel periods, and gifts for fellow plant lovers.