

Netting for Vegetables: A 2026 Guide for Gardeners
You've spent weeks nurturing seedlings, then one morning you find ragged leaves, missing shoots, or fruit marked by beaks and teeth. It's discouraging, especially when the plants looked healthy the day before. Netting for vegetables offers a simple first response: a physical barrier that keeps many pests away without turning everyday garden care into a complicated project.
The best results come from treating netting as part of plant care, not as a cover you install and forget. The mesh must match the pest, the edges must be sealed, and the cover may need to come off when plants require pollination or better airflow.
Why Vegetable Netting Matters for Your Garden
A bed can look healthy in the morning and show chewed leaves by evening. Netting changes that daily risk by placing a physical barrier between crops and pests. Fine insect mesh can block many flying insects, while bird netting and stronger covers protect fruit, seedlings, and tender plants from larger visitors.
Leafy greens and brassicas often benefit first. Caterpillars, cabbage moths, aphids, and other insects can damage new growth before a plant has time to recover. Young transplants also gain protection while their roots establish. Berries and fruiting plants may need bird netting, but flowering crops require care because a cover can keep pollinators out.
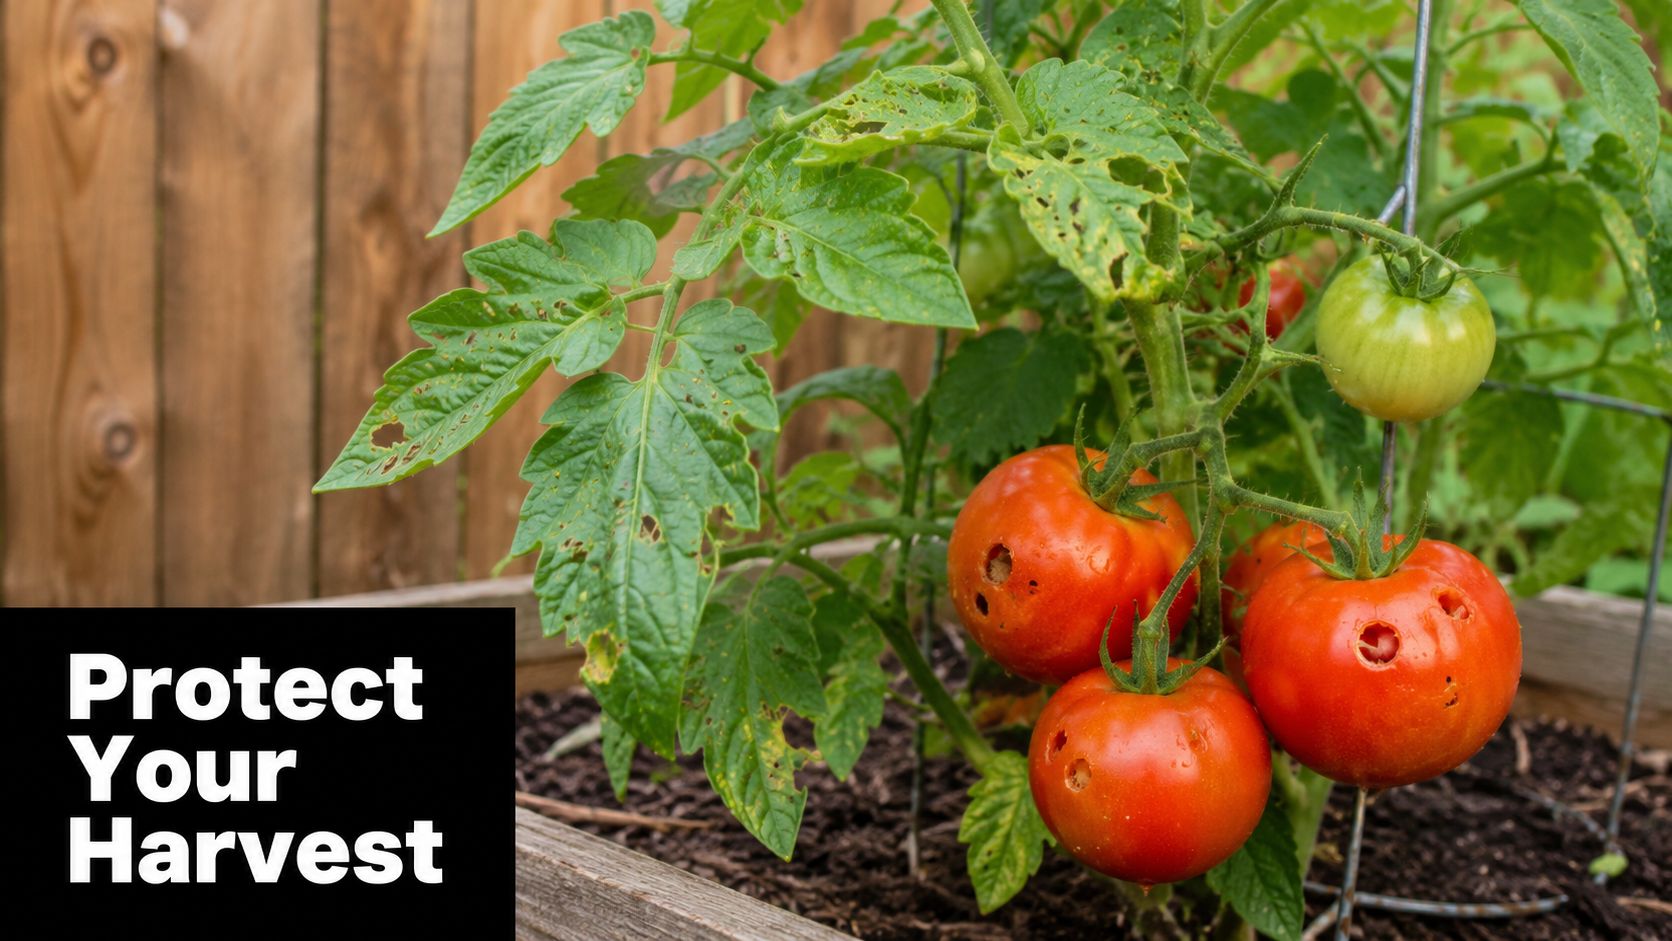
Check leaves, stems, and the soil surface before covering a bed. Netting stops new pests from entering, yet it may also shelter insects already feeding on the crop. A quick look at common pests in the garden can help you identify and remove the problem first.
A practical first barrier
Netting can make a noticeable difference when pest pressure is high. In an eastern African tomato trial, open plots produced 2.7 and 10.8 t/ha across two seasons. Large-mesh nets produced 7.9 and 38.4 t/ha, while small-mesh nets produced 16.8 and 50.1 t/ha in those seasons, according to the tomato netting trial results.
A home garden will not necessarily produce the same results. The comparison shows why exclusion matters, while also revealing the trade-off: netting changes airflow, humidity, temperature, and access for pollinators. On warm or still days, loosen the sides, lift the cover, or remove it when the crop needs ventilation. A barrier that protects leaves can otherwise create a damp, enclosed space that encourages disease or reduces fruit set.
A firm frame makes these adjustments easier and keeps the mesh from resting on plants. For a raised-bed enclosure, ideas to find wooden fence ideas can help you plan access, height, and the point where the cover meets the surrounding space.
Choosing the Right Mesh Size and Netting Type
A cover that stops one pest may also hold in heat and moisture. Choose mesh by identifying the insect or animal you need to exclude, then consider whether the crop can still receive enough air and pollinator access. Fine insect mesh may block aphids and leaf miners, but it can restrict airflow more than loose bird netting. Shade cloth serves another purpose, reducing light and heat rather than acting as a general pest barrier.
Mesh size means the opening between threads. Smaller openings block smaller insects; larger openings provide more airflow and easier pollinator access, but they will not stop tiny pests. Use this guide as a starting point, then check the crop under the cover during warm, still weather.
Mesh Size Guide for Common Garden Pests
| Target Pest | Mesh Size (mm) | Best For |
|---|---|---|
| Aphids and leaf miners | 0.6–0.8 | Leafy greens and brassicas |
| Spotted wing drosophila | 1.0 x 0.6 | Berry crops and fruiting plants |
| Cabbage moths and butterflies | Medium insect mesh | Brassicas |
| Birds | Large bird netting | Berries and exposed fruit |
| Rabbits and small animals | Larger, strong mesh | Young plants and low beds |
The 0.6–0.8 mm range has protected lettuce from leaf miners and aphids in field trials, while summer covering also reduced lettuce yield and quality, as summarized by Wageningen University's crop-covering findings. The lesson is practical: the finest mesh is not automatically the best choice for every season. If you are unsure which insect is present, compare it with this guide to small green insects in the garden before choosing the opening.
Cornell's guidance on spotted wing drosophila provides a more specific example. It reports that 80 g netting with a 1.0 x 0.6 mm mesh repeatedly excluded the pest over several production seasons. Complete exclusion depended on installing the cover early, keeping the material intact, sealing gaps, and designing the entryway carefully, according to Cornell's netting guidance.
Material and purpose
Polyethylene garden mesh suits outdoor use because it can be light, flexible, and durable. Nylon is useful when a soft cover needs to drape easily. Choose UV-resistant material for a cover that will remain outside through a long growing period, and check whether the product is made for insects, birds, shade, or general crop protection.
For rigid barriers around beds or fence openings, galvanized wire mesh for fences can help keep out rabbits and other small animals. Its larger grid will not stop tiny insects, so use purpose-made insect mesh for those pests. Whatever the material, make sure the cover can be lifted or ventilated when the crop begins to feel hot, damp, or enclosed.
Measuring and Mounting Netting on Beds and Rows
Installation becomes much easier when you measure the bed first instead of cutting as you go. Measure the bed's length and width, then add enough material for the netting to rise over hoops and reach the soil or frame on every side. The exact allowance depends on the height of your supports, but the edge should have room to be secured without pulling the cover tight across the plants.
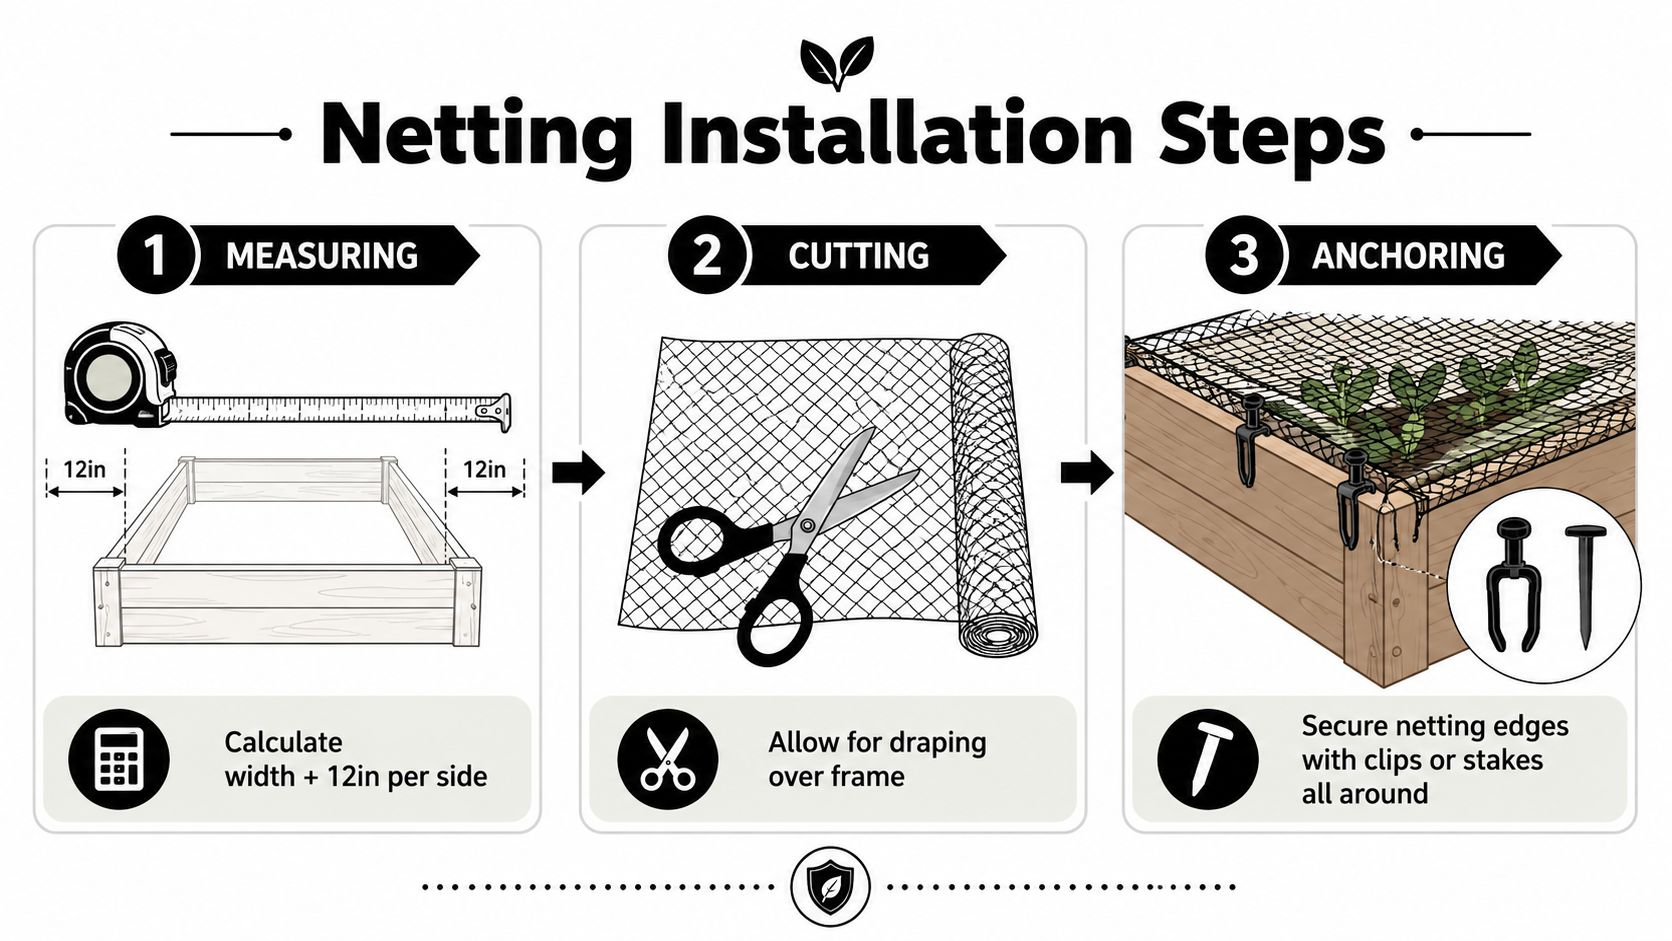
Three straightforward mounting options
- Hoops over a bed: Push flexible hoops into the soil along both sides of a raised bed or row. Drape the netting over them so leaves don't press against the mesh. This is usually the most forgiving approach because plants have room to grow.
- A simple frame: Build a frame from lightweight wood, conduit, or garden stakes. A frame gives you a defined shape and can make an opening easier to create, though it takes more preparation.
- Direct draping: Lay netting over low crops and secure it at the edges. This works for short plants, but inspect often because growing stems can push against the material and create gaps.
Anchor the edges with staples, clips, soil, smooth rocks, or boards. Wind is often the reason a cover fails. If the edge lifts even slightly, insects and small animals can enter beneath it.
Practical rule: The cover should be secure enough to resist wind, but easy enough to open that you'll still inspect and harvest regularly.
Create one deliberate access point rather than lifting a random corner each time. A clipped flap, hinged frame, or overlapping section lets you reach the plants while keeping the rest of the barrier in place. For raised beds with unusual dimensions, brackets for raised garden beds can help you plan a more stable frame.
A short visual demonstration can make the relationship between supports, draping, and anchors clearer:
Before closing the cover, check that no leaves, weeds, or tools are caught under the edges. A clean seal protects better than a large sheet loosely thrown over the bed.
Balancing Pest Protection with Airflow and Pollination
A covered bed can look protected while the plants underneath struggle. Netting blocks insects and rough weather, yet it can also hold heat and humidity around the leaves. In the eastern African tomato trial, daytime temperatures were higher under nets and higher still under plastic tunnels than in open-field conditions, according to the published tomato trial data. The cover changes the plant's microclimate as well as its exposure to pests.
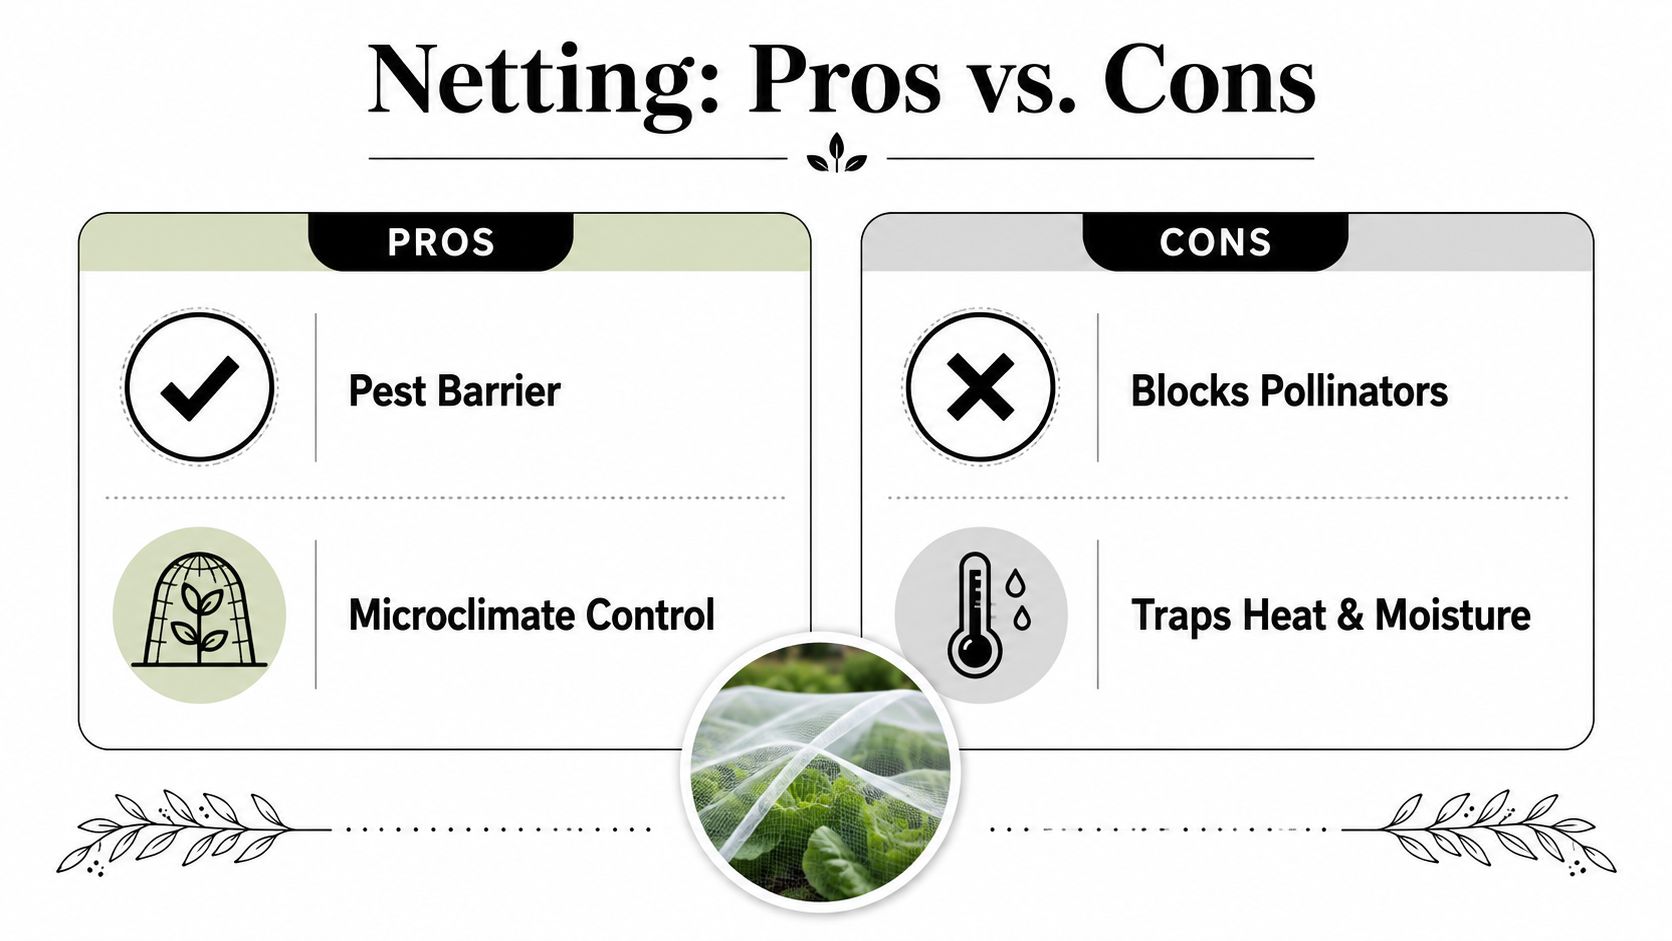
Watch the plant, not just the pest
Use the crop as your guide. Wilted leaves despite moist soil, foliage that stays damp, or noticeably warmer, more humid air beneath the cover all suggest that ventilation needs attention. Open the sides during suitable parts of the day, lift the cover temporarily, or choose a larger mesh if it still excludes the target pest.
Lettuce shows why exclusion alone is not the goal. Field research found that 0.6–0.8 mm nets fully protected lettuce from leaf miners and aphids, while summer covering adversely affected yield and quality, as reported in the field-vegetable crop-covering research. A barrier has done its job only if the crop remains healthy beneath it.
Flowering crops require a separate check. Squash, beans, cucumbers, tomatoes, and peppers may need insects to reach their flowers, depending on the crop and growing conditions. Open or remove the net when flowers appear if pollinators cannot enter. Replace it after the pollination window has passed, or sooner if pest activity increases.
Netting works best alongside other measures. Explore natural pest control for home approaches, then combine suitable options instead of asking one cover to solve every pest, airflow, and pollination problem.
Watch the balance: If netting excludes pests but also restricts airflow, pollination, or inspection, change the setup rather than leaving it closed.
Seasonal Care and Netting Maintenance Routine
A few minutes of maintenance can keep netting useful for more than one growing season. Start by putting the cover on before pests arrive, ideally when you transplant or sow a susceptible crop. Before sealing the bed, inspect the plants and soil so you don't trap an existing infestation beneath the barrier.
After strong wind or heavy rain, walk around the bed and check the edges, clips, hoops, and fabric. Look for tears, stretched corners, and places where the mesh has pulled away from the frame. Small holes can be closed with garden twine or fabric tape, but repair them promptly because a tiny opening can become an easy entry point.
A simple care rhythm
- After storms: Re-anchor loose edges and straighten supports.
- During growth: Lift the cover carefully to inspect leaves, flowers, and soil.
- When dirty: Brush away leaves and debris gently. Clean algae or soil buildup according to the material's care instructions, then allow the netting to dry fully.
- At the end of the season: Remove the cover before snow and ice can stretch or tear it.
- For storage: Fold or roll dry netting and keep it somewhere protected from rodents, moisture, and sharp tools.
Rotate the position of temporary covers when practical, especially if the same bed is used repeatedly. Moving the setup can reduce wear on one area and encourages you to reassess whether the crop still needs protection.
Don't leave a cover in place just because it worked earlier in the season. As plants grow, they may need more space, more ventilation, or access for pollinators. A seasonal routine keeps the barrier helpful rather than letting it become a forgotten layer over the crop.
Troubleshooting Common Netting Problems
Most netting problems have a simple cause. Start by looking at the shape of the cover, the condition of the edges, and the space between the plants and the mesh.
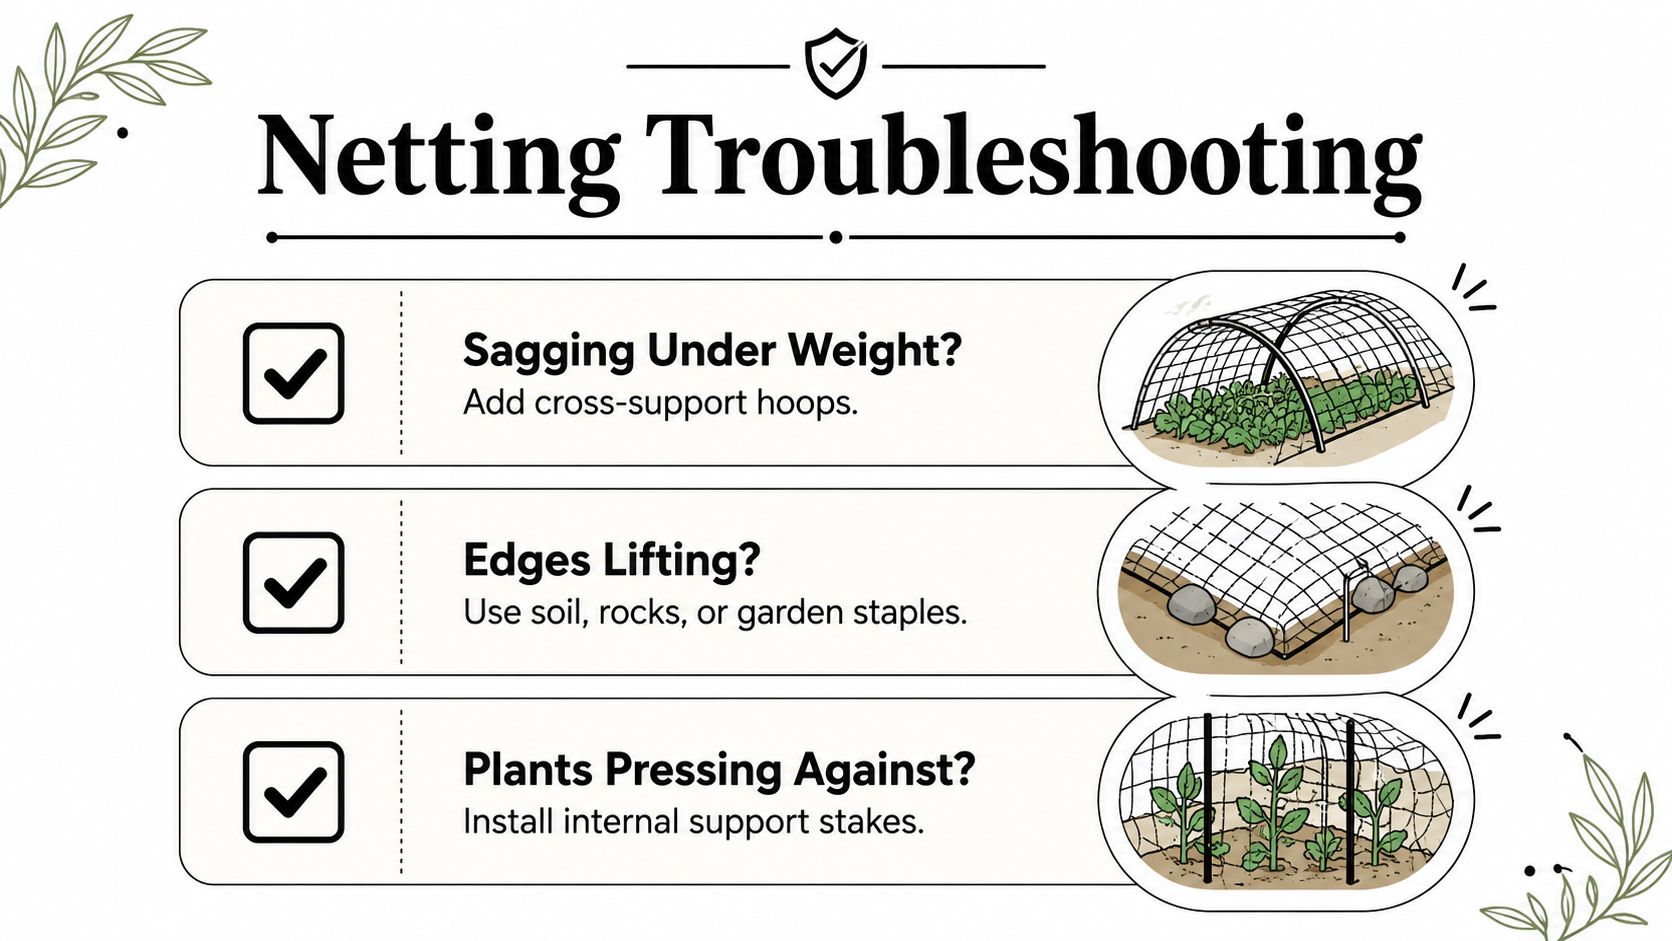
- Sagging under rain: Add cross-support hoops or another central support so water doesn't collect in a low pocket.
- Edges lifting in wind: Use soil, rocks, garden staples, or heavier stakes around the entire perimeter, not only at the corners.
- Plants pressing against the mesh: Install internal hoops or support stakes and give fast-growing stems more headroom.
- Small pests still getting inside: Check the underside and corners for gaps, then confirm that the mesh is fine enough for the pest.
- Pollinators trapped outside: Open or remove the cover when flowers need visitors, then close it again when practical.
- Mold or disease beneath the cover: Improve airflow, reduce unnecessary wetness, and remove affected plant material. High humidity and temperature inside net houses can encourage disease and aphid outbreaks, so ventilation and scouting matter.
Netting isn't always enough by itself. Small insects such as aphids and whiteflies can pass through some covers, while netting can also exclude beneficial insects. Research from sub-Saharan Africa found that continuous net coverage reduced pesticide applications by 70–100%, but it didn't effectively protect against some small insects, and opening nets during the day could help conserve natural enemies, as described in the protected vegetable production research. In North American brassica trials, exclusion netting worked against cabbage maggot, cabbageworm, and diamondback moth, showing why scouting and crop-specific decisions remain important.
Pair netting with regular inspection, biological controls, crop rotation, or other gentle methods when the pest doesn't match the barrier. The strongest setup is one you can adjust as the plants, weather, and insect community change.
Little Green Leaf offers decorative self-watering globes that help keep houseplants hydrated when your garden tasks or travel plans take you away from home. Visit Little Green Leaf to explore simple plant-care tools designed for steadier watering and more confident everyday growing.