

Plant Care for Beginners: Simple Habits That Work
You've just brought home a new pothos, and now its leaves are drooping. You're standing beside it with a watering can, wondering whether it needs more water, brighter light, a larger pot, or just a little time. Conflicting advice makes the moment harder: water on a schedule, never water on a schedule, mist every day, never mist at all.
Good plant care for beginners doesn't require perfect instincts or a greenhouse routine. It's a quiet practice of noticing how light, water, air, and soil work together. Your plant communicates through leaf posture, soil texture, growth, and the speed at which its pot dries. Once you learn those signals, care becomes a repeatable rhythm rather than a list of rules to memorize.
Why Plant Care Feels Harder Than It Is
You check a new pothos before work and find drooping leaves, yellowing at the base, and soil that still feels damp. Watering seems like the obvious response, yet it may add stress if the roots are already sitting in moisture. A plant's visible symptom is often the last signal in a longer chain involving its pot, soil, light, and room.
Start with a short pause and inspect three things: the light reaching the leaves, the drainage holes, and the soil below the surface. Notice whether the pot has recently moved, whether the room is cooler than usual, and whether the mix is drying at its normal pace. These checks turn a guess into a small, useful experiment.
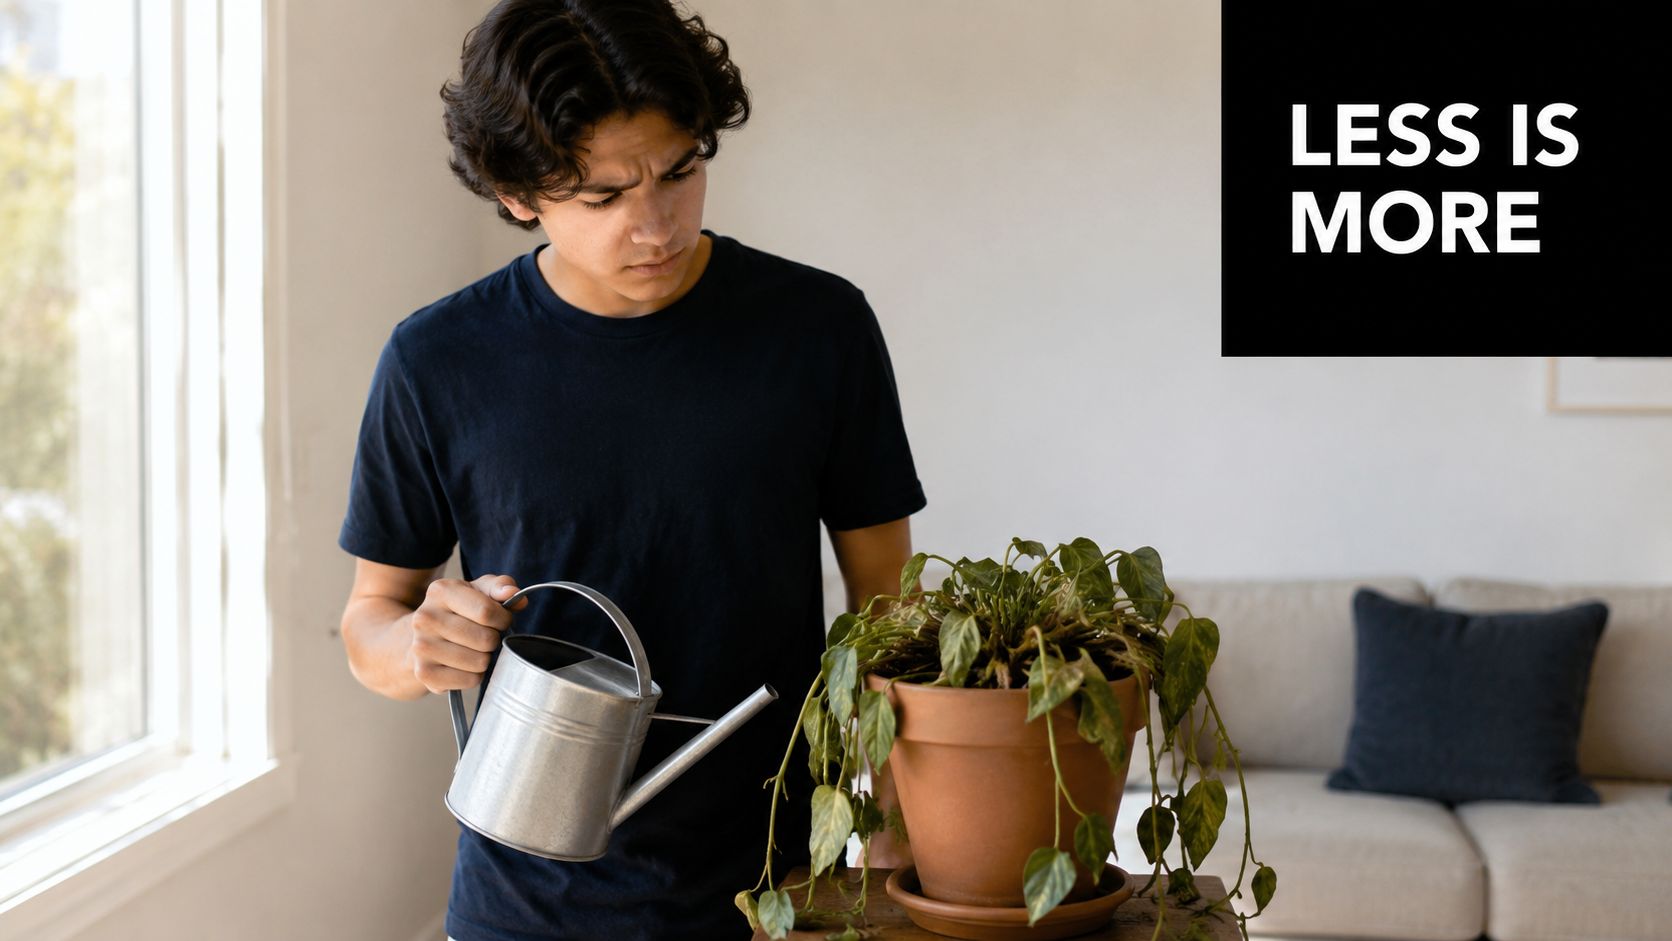
Read the plant as a system
Water use changes with the room. A bright window can dry a pot faster, while a cool, dim corner may keep the mix wet longer. Roots need moisture and air at the same time, so one fixed watering habit cannot suit every plant or every week.
NASA's 1989 study on interior plants and indoor air pollution examined foliage plants together with the microorganisms living in their soil. For beginners, the practical takeaway is simple: a houseplant is a living system made up of leaves, roots, soil, and microorganisms. Care works best when these parts are considered together.
Let the pot's changing condition guide you. Water when the root zone has used enough moisture, then watch how quickly it dries after the next adjustment. This rhythm is more dependable than copying a calendar reminder.
A reassuring starting point: You do not need perfect instincts. Observe one clue, make one small change, and give the plant time to show you the result.
That approach fits an apartment, an office, a busy week, or time away from home. With practice, plant care for beginners becomes a series of calm observations rather than a test you can fail.
The Root Zone Secret Every Beginner Should Know
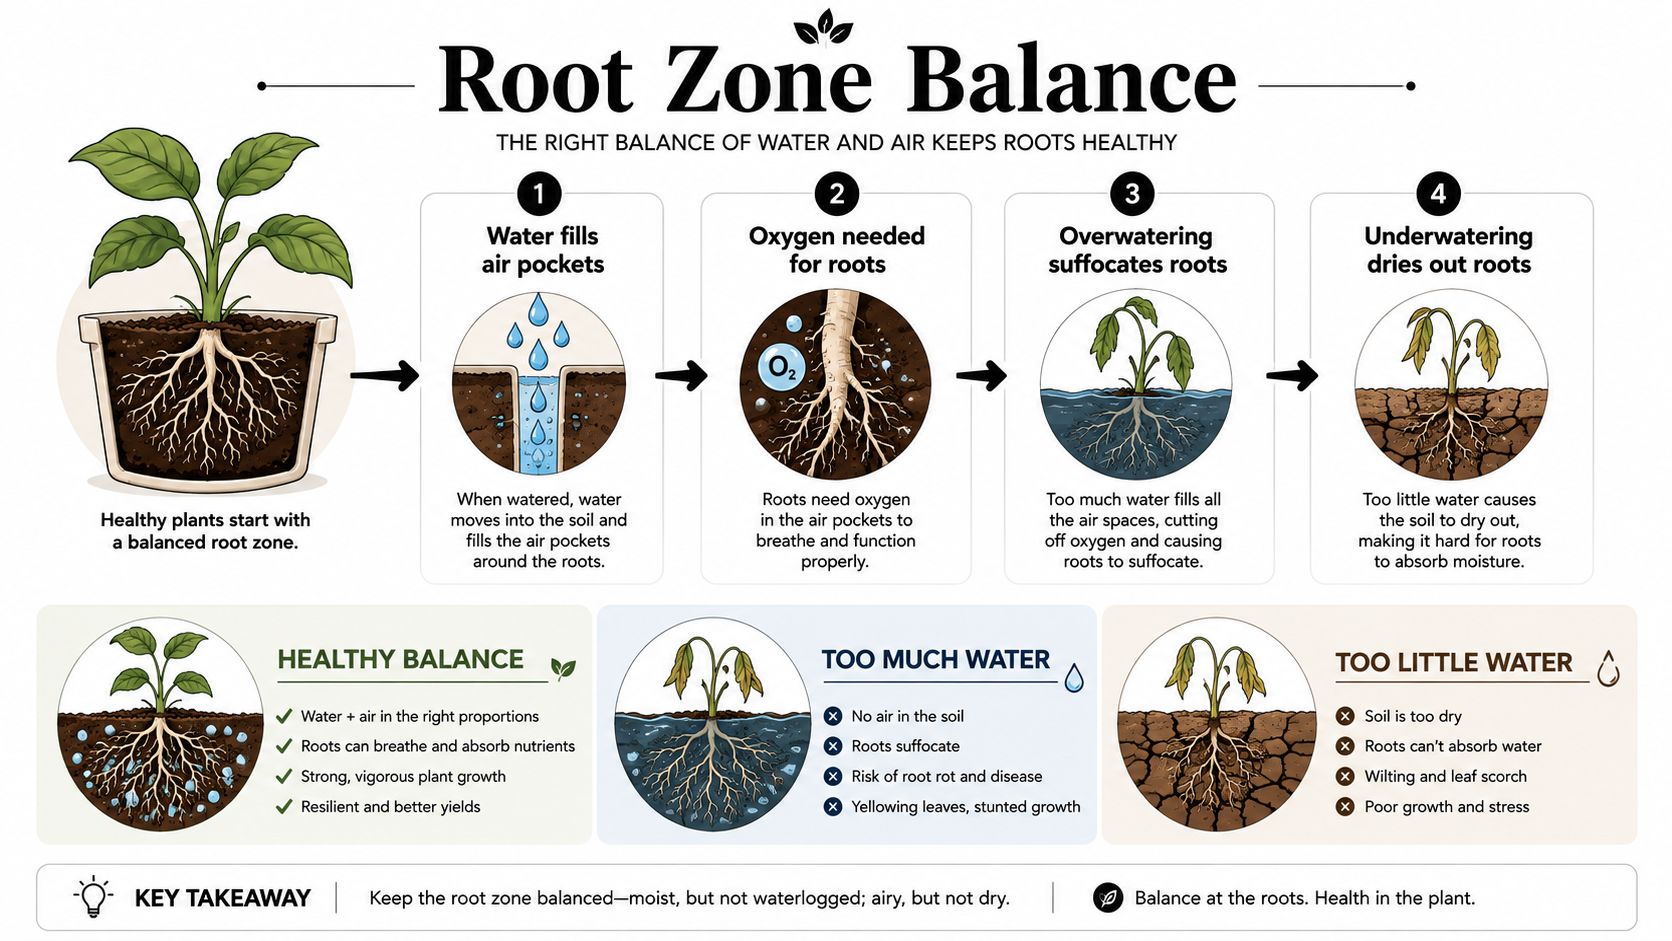
Roots need a balance of water and oxygen. Think of the potting mix like a sponge with tiny spaces inside it. Some spaces hold moisture, while others hold air. When you soak the sponge and never let it partially dry, water pushes air out of those spaces, leaving roots with too little oxygen. When the sponge dries completely and stays dry, roots lose access to moisture.
Extension guidance from Missouri Extension on houseplant root health explains why roots decline in persistently wet soil, while Clemson notes that roots require both water and oxygen. This is why overwatering can be as damaging as underwatering. The problem isn't only the amount of water you pour. It's the condition of the root zone afterward.
Check before you pour
Use more than one clue when you're unsure:
- Finger test: Push your finger about 2 inches into the soil. The surface can feel dry while the lower root zone remains moist, so check below the top layer.
- Wooden chopstick test: Insert a clean wooden chopstick into the mix, then pull it out. Dry soil usually leaves it fairly clean, while damp soil clings to the wood. For a shorter threshold, this guide to recognizing overwatering signs recommends letting the top 2–3 cm dry before watering again.
- Weight test: Lift the pot before and after watering. A container that feels noticeably light has lost substantial moisture, while a heavy pot may still hold water in the lower mix.
“Moist” means the soil contains available water but still has air spaces. “Wet” means the mix remains saturated, sticky, or heavy, especially several days after watering. The distinction matters more than a strict calendar because indoor drying speed changes with light, temperature, season, pot size, and soil composition.
Let excess water leave
A drainage hole is not a decorative detail. It gives surplus water a route out of the root zone. When you water, wet the mix thoroughly until excess drains from the bottom, then empty the saucer so the pot doesn't sit in standing water. Texas A&M AgriLife's houseplant guidance recommends checking moisture about 1 to 2 inches below the surface, watering when that zone is dry, and removing excess water from saucers.
Soil structure also affects this balance. A mix containing suitable organic material can hold moisture, while components that create air space help prevent compaction. If you're curious about the benefits of peat moss in soil, consider how any moisture-holding amendment fits with your plant, pot, and watering habits rather than treating it as a universal solution.
For a practical troubleshooting reference, this guide to preventing root rot can help you connect soggy soil, poor drainage, and declining roots. The central habit is simple: check first, water thoroughly when needed, and allow a partial dry-down afterward.
Overwatering is a particularly common beginner mistake. An industry summary citing extension and greenhouse data estimates that it accounts for 65–70% of indoor plant failures (source and context). Checking the root zone before watering is one of the highest-impact habits you can build.
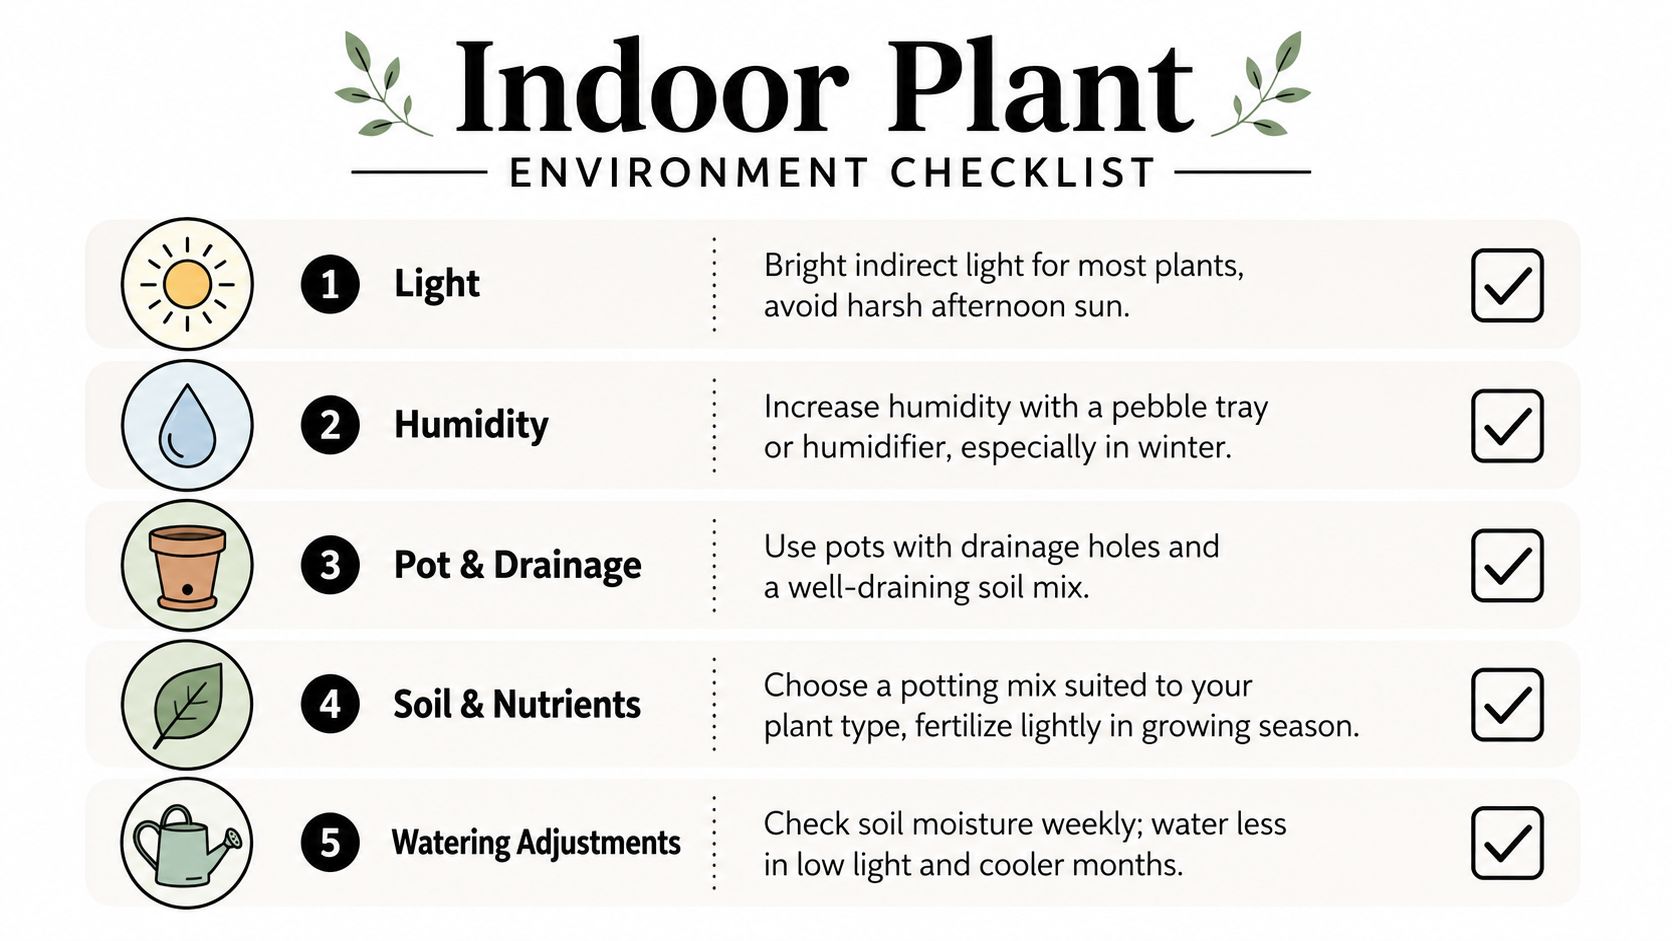
Building a Balanced Indoor Environment
A plant beside a bright south-facing window may use water quickly, while the same plant several feet from the glass stays damp longer. North-facing windows usually provide gentler light, so the soil may dry more slowly. Bright indirect light suits many common houseplants, but strong afternoon sun can scorch foliage that has not adapted to it.
Light is sometimes measured in foot-candles. Many houseplants tolerate around 50–200 foot-candles and grow better closer to 200–800+ foot-candles, depending on the species, as shown in this houseplant light chart. Use these figures as orientation rather than a reason to buy a light meter. Your plant's drying pattern matters more than a perfect reading.
Let the container set the pace
The pot acts like part of the plant's watering system. Terracotta is porous and lets moisture escape through its walls, while glazed ceramic and plastic usually keep the mix wet longer. A larger pot contains more soil and takes longer to dry. A small plant in an oversized container can therefore remain wet around its roots even when the surface feels dry.
Choose a container with a drainage hole, then match the potting mix to the plant. For many foliage plants, a well-draining mix amended with perlite or orchid bark leaves useful air space around the roots. Plants that prefer steady moisture may need a different blend. One soil recipe cannot suit every plant, pot, and room.
Humidity affects the environment too, but it does not need to become a daily project. Many houseplants manage average home humidity. During dry winter heating, grouping plants can create a slightly more humid pocket. A pebble tray or humidifier may help plants that respond poorly to very dry air. Keep the pot above the water on a pebble tray, so the container does not sit in water.
Environment rule: Brighter light, porous terracotta, and airy soil usually mean faster drying. Lower light, plastic, and dense soil usually mean slower drying.
Run a quick environment audit
Look at each plant as a small system:
- Light: Is the window bright, gentle, direct, or shaded by buildings?
- Pot: Does it have a drainage hole, and is it much larger than the root ball?
- Soil: Does the mix feel loose and springy, or dense and slow to dry?
- Humidity: Is the plant beside a heater, air conditioner, or draft?
- Watering response: How heavy is the pot several days after watering?
These observations give you a reason to adjust care. A pothos in a plastic pot near a north-facing window that stays heavy for a long time may need less frequent watering and better light, not more water. A fern in airy soil and bright indirect light may dry rapidly, so a more stable hydration method could suit it better.
If natural light is limited, growing plants with lights can help you choose placement and supplemental lighting without repeatedly moving the plant.
A Calm Weekly Routine for Healthier Plants
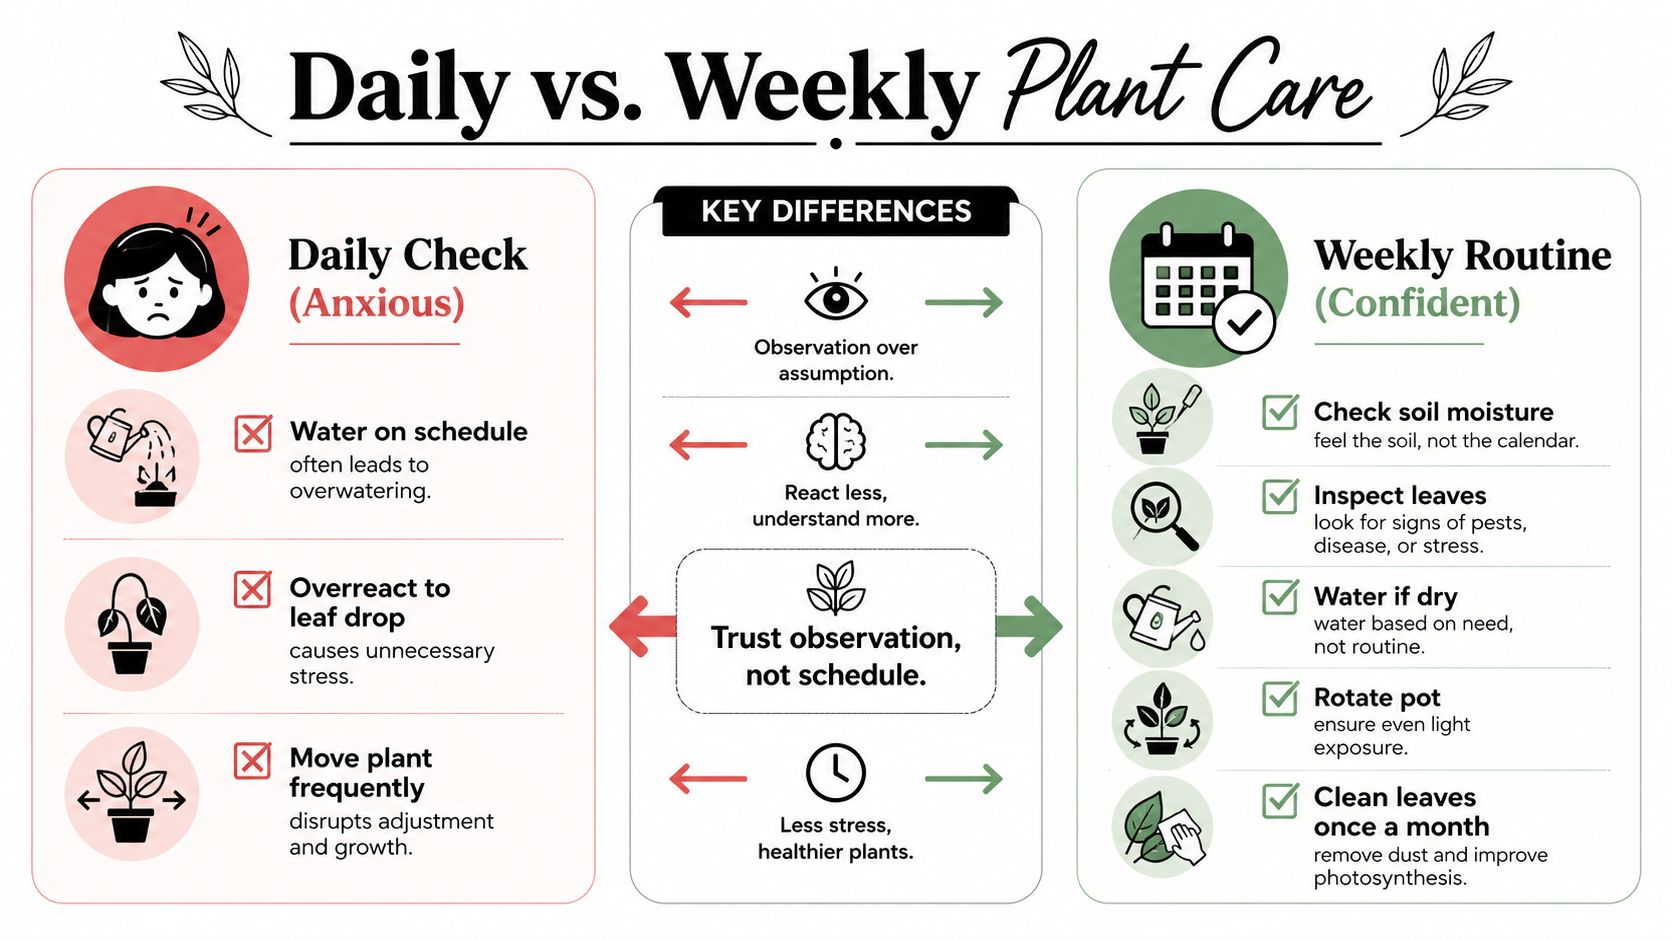
On a quiet Sunday morning, you notice one plant leaning toward the window and another with a yellowing leaf. Use that moment for a calm walk-through. The goal is not to water every pot, but to notice how each plant, its soil, and its room are changing.
Start with the leaves. Look for firm new growth, sudden leaf drop, pale color, or crisp edges. Then consider the plant's recent care and environment before choosing an action. A weekly visit works like a quick conversation: observe first, respond second.
A short plant date
Use this simple order:
- Observe the position: Check whether the plant still receives the light you intended. Curtains, seasonal changes, and nearby furniture can alter exposure.
- Notice recent care: Recall when you last watered and whether the pot drained freely.
- Check the plant's response: Look for new growth, spreading yellowing, or a plant that has stopped recovering after watering.
- Choose one action: Water only when the root zone has dried enough for that plant, improve airflow or light if needed, or leave it alone.
- Let excess water drain: If watering is appropriate, apply it slowly and thoroughly, then empty any standing water.
The Texas A&M watering guide recommends checking plant conditions rather than treating the calendar as the decision-maker. A comparison of overwatered and underwatered houseplants can also help you connect visible symptoms with the plant's recent moisture pattern.
Learn the difference between stress signals
Yellowing is a prompt to slow down and observe, not an automatic request for more water. During the first day, check whether the yellowing is limited to an older leaf or appearing across new growth. Remove a leaf only if it is fully damaged, and avoid changing several care factors at once.
Over the next forty-eight hours, watch for spreading discoloration, a worsening droop, or a sour smell from the soil. If the plant is drying too slowly, move it away from a cold draft or improve light gradually. If it is clearly dry and wilted, water thoroughly and allow drainage. One measured response gives the plant time to show whether the change helped.
Keep a brief note when the pattern is unclear. Monthly leaf cleaning can reveal pests and make color changes easier to spot. Rotate the pot occasionally if growth is becoming one-sided, but keep light conditions consistent after the adjustment.
Your routine should follow the room's rhythm. Darker, cooler winter conditions often slow water use, while active spring growth may increase demand. A flexible indoor plant watering schedule gives you a reference without forcing every plant onto the same weekday.
Hands-Off Hydration for Travel and Busy Weeks
A plant can receive thoughtful care without needing daily attention. The safest approach is to choose a hydration method that matches the plant's moisture needs, test it while you're home, and avoid introducing a new setup immediately before leaving.
| Method | Setup Effort | Coverage Duration | Best For | Aesthetic |
|---|---|---|---|---|
| Self-watering globe | Low | Several days to up to two weeks, depending on conditions | Medium-sized tropicals and plants that prefer steadier moisture | Decorative glass accent |
| Cotton-cord wick and reservoir | Moderate | Adjustable, depending on reservoir size and wick flow | Plants that tolerate consistent moisture | Mostly hidden |
| Bottom-watering tray with pebbles | Low | Short support for humidity, not a complete watering system | Humidity-loving plants in dry rooms | Simple and visible |
| Plant-sitter care card | Low setup, requires another person | As long as the sitter can visit | Mixed collections with different needs | No added object |
Self-watering globes are visually gentle and simple to set up. They release water gradually near the root zone, making them useful for a medium-sized tropical or fern when you're away, but they still need testing. Soil texture, insertion angle, pot size, and plant demand can all change the flow.
For longer absences, vacation plant-care guidance recommends deep watering about 24 hours before departure so the soil can absorb moisture and drain excess water. That source notes that drought-tolerant plants may manage about 2 weeks after deep watering, while thirstier tropical plants often need a wick or self-watering setup for absences beyond 5–7 days.
Match the method to the plant
A cotton wick can work well for a plant that likes consistent moisture, but it may keep a drought-tolerant plant too wet. A pebble tray can support humidity, but it shouldn't replace proper root watering. A plant sitter needs a clear card stating which plants should be checked, what dry soil feels like, and where to pour excess water.
Little Green Leaf's decorative self-watering globes use a gradual-release design that responds to drying soil through changes in airflow. The hand-blown glass globes come in 100 ml, 200 ml, and 350 ml sizes, with optional tip covers and adapters, so owners can choose a setup for different pots and soil types.
Group plants together when you can, especially during dry indoor weather. This creates a shared humidity microclimate, though every pot still needs its own moisture check. Test any system for several days at home, inspect the soil afterward, and adjust before travel.
Choosing Low-Maintenance Plants for Real Life
The easiest plant to care for is often the one that fits your room. A resilient plant in suitable light can recover from a missed watering, while a demanding specimen in the wrong corner may keep you guessing every day. Starting with a forgiving plant gives you room to learn the rhythm of soil, roots, and leaves without turning every mistake into an emergency.
Beginner-friendly choices often include snake plants, pothos, ZZ plants, and cast iron plants. They can tolerate irregular watering and variable indoor conditions better than many delicate specimens, although no plant thrives in complete darkness or permanently saturated soil.
Choose for your actual home
Match the plant to the conditions you already have:
- Low-light apartment: Consider a snake plant, ZZ plant, or pothos, then place it as close as practical to the available natural light.
- Dry heated room: Group tolerant plants and avoid specimens that require constantly humid conditions unless you're prepared to add humidity support.
- Bright windowsill: Select a plant that can handle the light, or use a sheer curtain to soften intense afternoon exposure.
- Frequent travel: Favor plants that tolerate dry-downs and combine them with a tested wick or self-watering system when needed.
Trend coverage for 2026 describes a movement toward curated, lower-maintenance plants and more self-sustaining care practices, rather than collecting only high-maintenance specimens (houseplant trend coverage). That shift reflects a practical idea: a realistic collection can be healthier and more enjoyable than an idealized indoor jungle that demands constant intervention.
Plant selection is an act of self-awareness. You're not choosing the plant that looks best in someone else's bright, humid home. You're choosing the plant that can live well beside your window, your schedule, your pets, and your travel plans. Success with one adaptable plant builds the observation skills you'll use with every future addition.
Simple Habits That Build Lasting Confidence
Plant care becomes manageable when you return to four questions: Does it have suitable light? Is the root zone dry enough for water? Can the roots access air? What has changed in the environment? Those questions are more useful than a rigid calendar because they help you respond to the plant in front of you.
Keep this starter checklist somewhere visible:
- Weekly soil check: Test below the surface, lift the pot, and water only when the root zone needs it.
- Monthly leaf care: Dust broad leaves gently and look closely for pests, spots, or unusual color changes.
- Seasonal light review: Notice whether the sun angle, curtains, or furniture has changed the plant's exposure.
- Quarterly pot review: Check drainage, root crowding, soil condition, and whether the container still suits the plant.
Overwatering, sunburn, a dropped leaf, or a failed rescue doesn't mean you're bad at plants. Each mistake gives you information about your home and your habits. Even experienced plant owners lose plants while learning which species and systems fit their lives.
Spend two quiet minutes each week observing. Look for new growth, changes in leaf color, altered posture, and soil that is drying at a different speed. Confidence grows through consistency and curiosity, not perfection, and one thriving plant is enough evidence that you can learn this.
Little Green Leaf offers decorative self-watering globes for busy homes, travel weeks, and beginners who want steadier hydration without timers or apps. Visit Little Green Leaf to explore simple plant-care tools that help make your watering routine calmer and more consistent.