

Bird Nest Fern Problems: How to Diagnose and Fix Them
You notice it while making coffee: the bird's nest fern that usually adds a glossy green shape to the room has brown tips, a few pale fronds, or leaves that feel oddly limp. The first instinct is often to water it again, but bird nest fern problems can come from opposite causes. Dry air, wet soil, harsh light, poor drainage, and water trapped in the crown can create similar-looking symptoms.
The good news is that bird's nest ferns are generally forgiving. Mainstream horticulture guidance describes serious problems as uncommon, while still identifying recurring concerns such as scale, mealybugs, slugs, snails, foliar nematodes, and bacterial leaf diseases in North Carolina State University's plant profile. A steady routine makes diagnosis much easier.
Why Your Bird's Nest Fern Might Be Struggling
Your fern isn't necessarily failing because you missed one watering. More often, its surroundings have drifted away from what it prefers. A plant placed beside a heater may lose moisture from its fronds quickly, while the soil remains damp. A fern in a bright office may receive intense afternoon sun through glass, even though the room itself feels comfortable.
Water, humidity, light, and drainage are the four areas to check first. They overlap, which explains why a brown edge doesn't always mean “water more.” A plant can have crispy tips from dry air, inconsistent watering, or too much direct light. Yellowing can point toward soggy soil, but it can also reflect aging or temperature stress.
Bird's nest ferns grow from a central rosette, often called the crown. New fronds emerge from this center, and broad leaves can hold moisture if water is poured overhead. For that reason, the crown deserves more attention than a typical leafy houseplant. Keep water directed toward the soil around the plant rather than allowing it to collect in the center.
A useful starting point: diagnose the plant's environment before reaching for fertilizer, pesticide, or a larger pot.
Apartment conditions make this especially important. Air-conditioning vents, radiators, drafty windows, and low-humidity rooms can all affect the same fern in different ways. If you're choosing plants for indoor air quality, Purified Air Duct Cleaning recommends considering how plant placement and room conditions work together, not just how a plant looks on a shelf.
Start with one quiet observation: feel the soil, inspect the crown, and look closely at the undersides of the fronds. You'll usually find that a small change in routine is more useful than a dramatic rescue.
Reading the Leaves, Brown Tips, Yellowing, and Wilting
Leaves communicate, but they rarely give only one possible answer. The most helpful clue is the combination of the symptom, the soil, and the plant's location.
Brown tips and crispy edges
Brown, dry tips commonly appear when indoor air is dry, the soil has been allowed to dry too far, or the fern receives harsh direct light. A plant beside a heating vent may have crisp margins even when the potting mix still feels moist because warm moving air dries the foliage faster than the roots.
In a bright office, check whether sunlight falls directly on the fronds during part of the day. Bird's nest ferns prefer bright, indirect light, and prolonged harsh sun can produce pale, stressed, or browned foliage. Fertilizer buildup can also contribute to browning, especially if feed has been applied heavily or repeatedly.
Yellowing fronds
Yellow leaves often deserve a soil check before a watering can. Overwatering and poor drainage can leave roots short of air, while a pot sitting in runoff keeps the lower soil wet for too long. Remove standing water from a saucer promptly, as guidance from The Sill's bird's nest fern care guide warns against water remaining beneath the pot.
Yellowing that appears on an older outer frond may reflect the plant's normal turnover. Yellowing across several fronds, particularly alongside wet soil or a sour smell, deserves closer inspection. For a broader comparison of causes, see this guide to what causes yellow leaves on plants.
Wilting and limp fronds
Limp leaves can mean the soil is too dry, but they can also signal root stress. Roots damaged by persistent soggy conditions may not absorb water effectively, so adding more water can make the problem worse. Temperature swings, cold drafts, or a nearby vent can add another layer of stress.
Use this simple comparison before changing care:
| Symptom | First check | Likely direction |
|---|---|---|
| Brown, crispy edges | Airflow, direct sun, soil moisture | Reduce stress and stabilize moisture |
| Yellowing | Drainage, soil wetness, frond age | Check roots if the pattern spreads |
| Limp fronds | Soil texture, roots, temperature | Separate thirst from root damage |
A Simple Watering and Humidity Routine
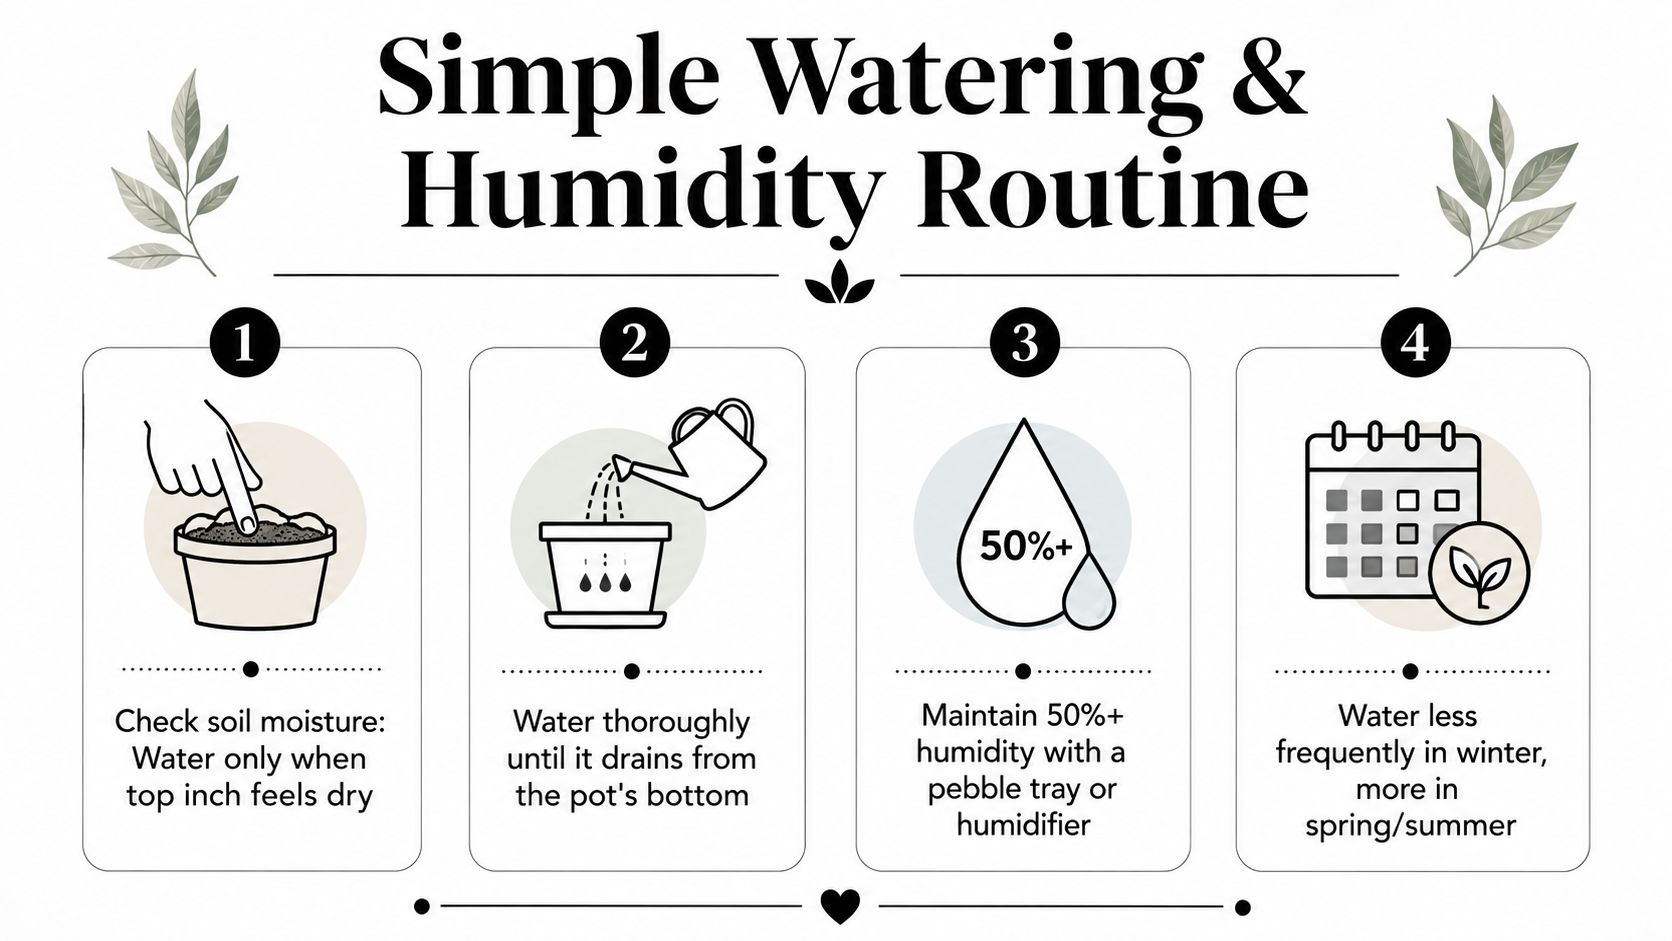
A bird's nest fern does best with a repeatable rhythm rather than a rigid calendar. Indoor soil dries at different speeds depending on the pot, light, season, airflow, and root mass, so check the plant itself.
Make the soil check your first step
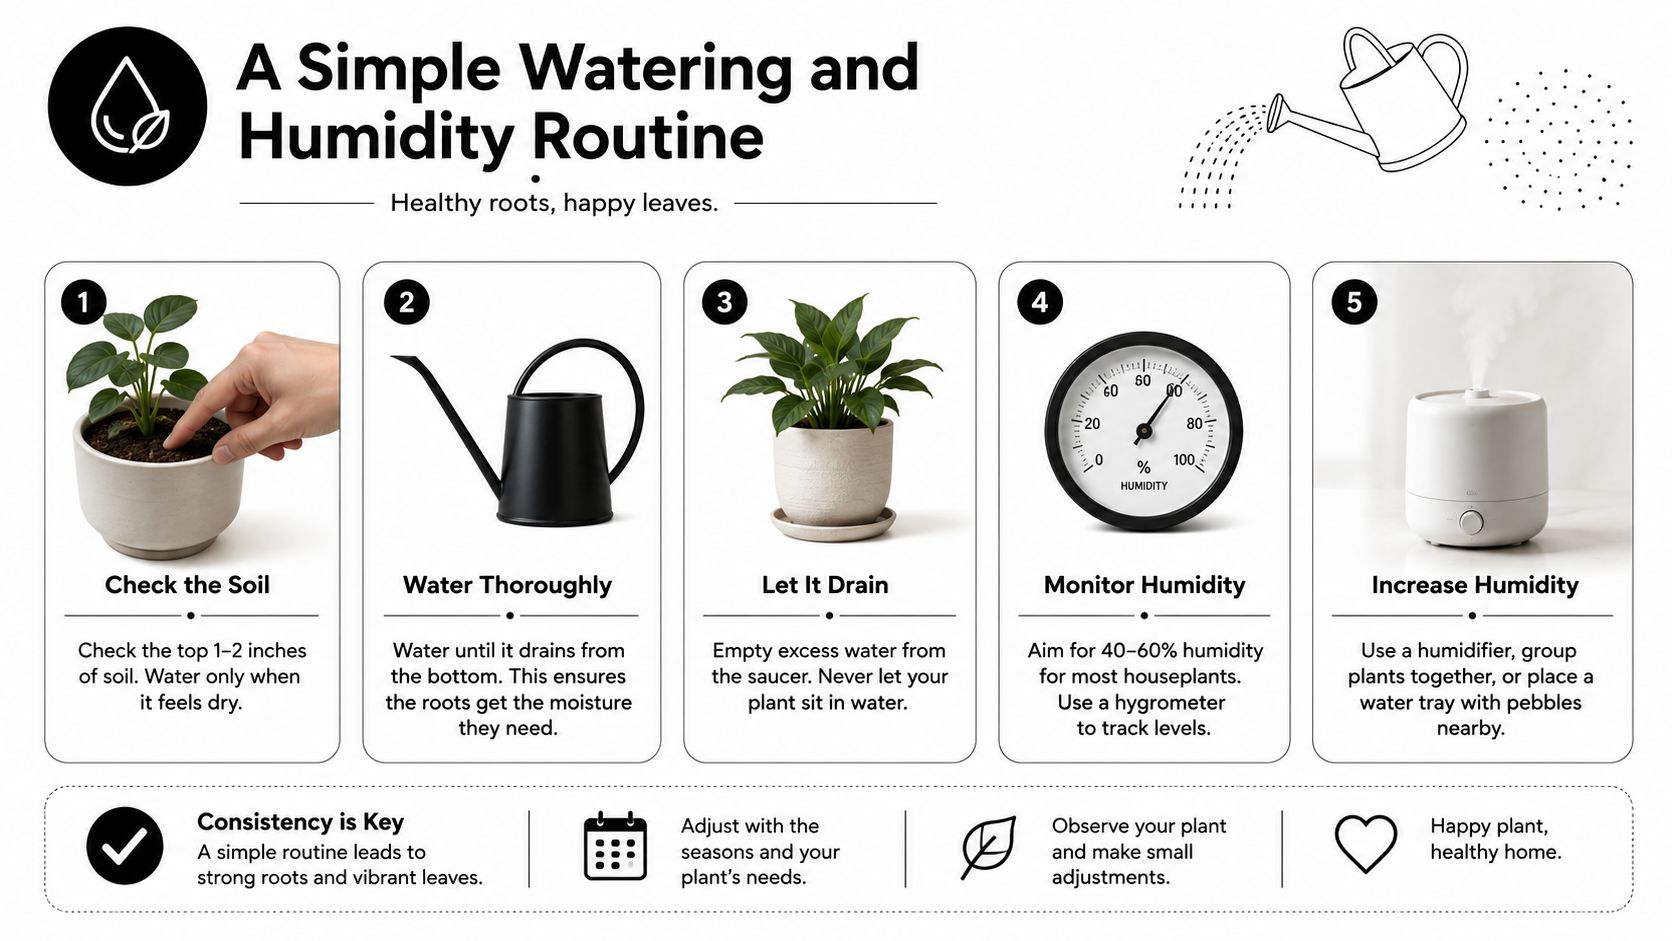
Push a finger into the top inch of soil. If that layer feels dry, water thoroughly. If it still feels damp, wait and check again later rather than adding a small splash that leaves the lower mix perpetually wet.
When watering, pour slowly around the outer edge of the pot until water drains through the bottom. This moistens the root zone while reducing the chance of water settling in the central rosette. Empty any saucer or cachepot after drainage. The pot needs an open path for excess water to leave.
Watering needs usually change with the seasons. Your fern may need attention more often during active spring and summer growth, while winter heating and lower light can create a confusing combination of dry air and slower soil drying. Let the soil, not the calendar alone, guide you.
Raise humidity without creating wet foliage
Group plants together to create a slightly more humid pocket, place the fern near a pebble tray, or run a humidifier nearby. With a pebble tray, keep the pot above the water rather than allowing the container's base to sit directly in it. Avoid positioning the fern beside an air-conditioning outlet, heater, or frequently opened exterior door.
Misting the leaves isn't a dependable substitute for stable room humidity, and repeated wetting can leave broad fronds damp. A hygrometer can help you understand whether the room is consistently dry, especially in an office or apartment where comfort settings change throughout the day.
A self-watering globe may help busy owners maintain steadier moisture during a short trip, but it shouldn't replace a drainage check. Test any watering tool before travel, make sure the pot drains freely, and keep the globe's delivery moderate rather than saturating the mix.
For a visual walkthrough of a gentle routine, watch this bird's nest fern watering guide.
Diagnosing and Fixing Root and Crown Rot
Rot is one of the easiest bird nest fern problems to misread because yellowing, wilting, and a soft base can also appear after ordinary watering mistakes. Crown rot begins around the central rosette, often after water remains trapped there. Root rot develops below the soil when roots stay in a wet, poorly draining mix.
Look for a combination of signs rather than relying on one visual detail. A sour or rotten smell, collapsed roots, mushy tissue, and a plant that stays wilted despite wet soil are more meaningful than dark coloring alone. Some bird's nest ferns naturally have black roots, so black roots aren't automatically diseased.
Follow a careful rescue sequence
- Stop watering. Move the fern away from other plants while you assess it.
- Check the container. Confirm that drainage holes are open and that the pot isn't standing in collected water.
- Unpot gently. Support the plant near the soil line and loosen the container without pulling on the crown.
- Inspect by texture and smell. Healthy roots have structure. Rotten roots feel collapsed, squishy, or slimy and may smell unpleasant.
- Trim damaged roots. Use clean scissors to remove soft, deteriorated sections, keeping firm tissue.
- Let the root mass air-dry briefly. The surface should no longer be dripping before repotting.
- Repot in fresh, sterile, very well-draining mix. Penn State Extension identifies Pythium root rot with yellowed, stunted, wilted plants and brown rotted roots, and recommends pathogen-free pasteurized media in its fern disease guidance.
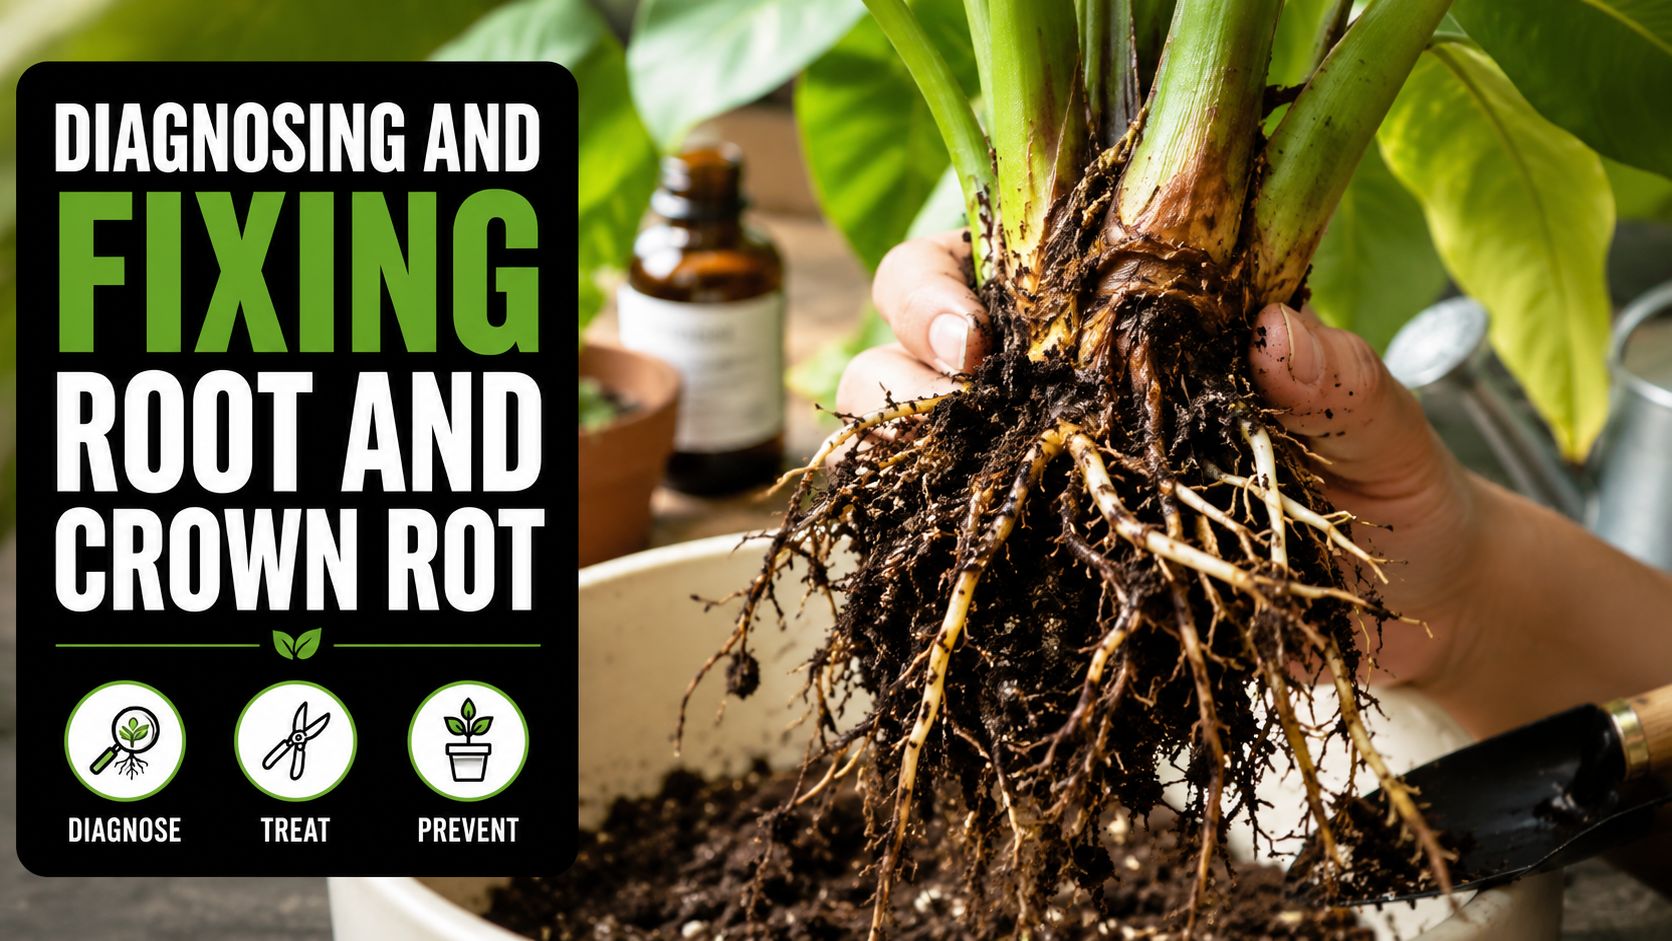
Don't bury the crown during repotting. Keep it at the same level as before, then resume careful watering around the pot's edge once the plant is settled. This guide to signs of root rot in plants can help you compare root texture and other warning signs.
Early action is often kinder than repeated watering. If the crown itself has turned soft and the newest growth is collapsing, recovery is less certain, but removing the source of excess moisture still prevents the problem from spreading through the pot.
Spotting Pests and Fungal Issues Early
Environmental stress usually affects broad areas of the fern in a fairly consistent pattern. Pests and disease tend to create more specific clues, such as clustered insects, irregular spots, sticky residue, or lesions that expand.
Compare the visible clues
Scale may look like small, fixed bumps on the fronds. Mealybugs appear more cottony and may gather near protected areas. Slugs and snails are more likely to leave irregular feeding damage, especially when the plant spends time outdoors or sits where these pests can reach it. Foliar nematodes are harder to see directly, but extension guidance lists them as a recurring concern for bird's nest ferns.
Bacterial leaf disease deserves prompt attention. Penn State Extension describes bacterial blight on Asplenium and bird's nest fern as translucent spots that enlarge quickly, then become reddish-brown with purple halos. Small dark green spots at the base of fronds can be associated with foliar nematodes. These patterns differ from evenly browned tips caused by dry air.
The North Carolina State University profile lists slugs, snails, scale, mealybugs, bacterial leaf diseases, leaf nematodes, and chemical insecticides among possible concerns, while still describing the plant as having no serious problems overall. The practical message is balanced: inspect early, but don't panic at the first blemish.
Keep disease from gaining ground
Avoid overhead watering and keep the fronds as dry as practical. Moisture trapped among broad leaves and in the central rosette can support disease spread, so direct water to the soil and improve gentle air movement around the plant. Don't place a struggling fern tightly against other plants.
Wipe visible pests from sturdy fronds with a soft damp cloth, isolate the plant, and remove badly damaged leaves with clean scissors. Avoid harsh chemical products or leaf-shine treatments, since ferns can be sensitive to chemicals. For a wider discussion of how room moisture and pest conditions can interact, explore this explanation of the humidity pest connection.
Fungus gnats often point to persistently damp potting mix rather than a problem on the foliage. This resource on how to prevent fungus gnats offers additional context, but the first fern-specific step remains the same: let the surface dry appropriately and verify that excess water can escape.
A Calm Weekly Care and Monitoring Routine
A healthy routine can fit into a busy apartment schedule. Choose one day each week to look at the soil, scan both sides of the fronds, and check the space around the pot. You don't need to measure every condition perfectly. You need to notice changes before they become a pattern.
Use this short checklist:
- Feel the soil: Check the top inch and water only when it feels dry.
- Protect the crown: Pour around the outer edge, never into the central rosette.
- Inspect the leaves: Look for spreading spots, cottony insects, fixed bumps, or new browning.
- Review the location: Keep the fern in bright, indirect light and away from heaters, vents, and harsh sun.
- Check drainage: Confirm that water exits the pot and isn't collecting below it.
- Adjust gently: Change one factor at a time so you can tell what helps.
Seasonal changes may require a different watering pace. Winter heating can dry the air while slower growth leaves soil wet for longer, so check moisture rather than assuming the fern needs more water. Before travel, water according to the soil's condition and test any steady-hydration tool in advance.
Consistency matters more than perfection. A fern can recover from an imperfect week when its next care decision is thoughtful.
The serious nursery history of these plants is a useful reminder without being a reason for alarm. A 1984 report documented a leaf spot and blight of Asplenium nidus that caused “extensive losses” in many Florida nurseries, as recorded by the American Phytopathological Society. At home, careful watering, clean tools, good drainage, and early observation give you a practical way to reduce risk.
If you want a simpler way to support consistent moisture during busy weeks or travel, explore the decorative self-watering globes from Little Green Leaf. Choose a style and size that suits your fern, test it before leaving, and pair it with the same soil and crown checks that keep bird's nest fern care steady.